 Enquiry Now

 Contact Us


 Check Out
 +44 20 4571 2395

 PRINCE2® Foundation and Practitioner Training


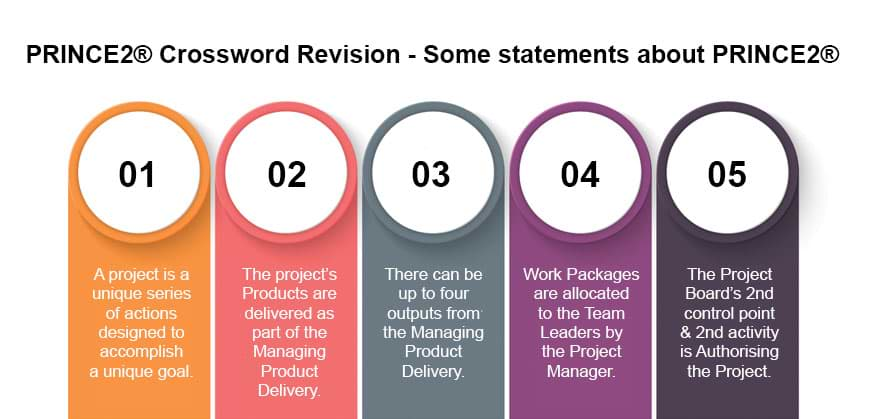
Read (and memorise as many as you can!) all of the following statements about PRINCE2®.
Then download our PRINCE2 crossword and see how many you've remembered!
- A project is a unique series of actions designed to accomplish a unique goal.
- The Project brief is the first key document in PRINCE2’s prescribed method for starting up a project.
- A project is defined as a temporary organisation, created to deliver one or more business products based on and agreed Business Case.
- The Project Manager will spend most of their time on the Controlling a Stage process which describes the day to day monitoring and control activities for the project.
- The Project Initiation document collates most of the documents from the SU (Starting up a Project) and IP (Initiating a Project) processes.
- The Project Initiation Documents, including the Project Plan are part of the Initiating a Project process which examines the justification for the project.
- The pre-project process that gathers the necessary data to start a project is the Start up a Project process.
- The process that provides a controlled way to complete a stage and plan the next one is Managing a Stage Boundary.
- Information is provided to the Project Board at the end of each stage about the current status of a project as part of the Managing a Stage Boundary process.
- The project’s Products are delivered as part of the Managing Product Delivery process.
- There can be up to four outputs from the Managing Product Delivery process.
- Delivery of the products and preparation for project closure are part of the Closing a Project process.
- All the products defined in the Project Plan are listed in order of importance in the Product Breakdown Structure.
- The Team Manager creates a Team Plan to plan the project team’s activities. This is agreed with the Project Manager.
- Information from upper management, outlining what is required from the project is contained in the Project Mandate.
- The time from the start of the project and the close of the project and acceptance of the product is known as the Project Lifecycle.
- The Project Board must be given an Exception Plan if a stage is expected to go out of the agreed tolerance.
- The method and frequency that information is exchanged is defined in the Communication Management Strategy.
- The Project Board approves the completion of a stage and authorises the start of the next stage during the Directing a Project process.
- The Project Manager creates a regular Highlight Report for the Project Board to provide information on the process of each stage. This is produced on a time-driven frequency, e.g.: every two weeks.
- The Project Board’s 2nd control point and 2nd activity is Authorising the Project.
- Work Packages are allocated to the Team Leaders by the Project Manager.
- The Team Manager provides Checkpoint Reports to the Project Manager, based on the regular team meetings.
- A grouping of a certain set of techniques used in the development of the product is known as a Technical Stage.

Once you've finished the PRINCE2 Crossword download the PRINCE2 Crossword Solution to check your answers. Remember, no cheating!!
 Andy Trainer
 15 Jul 2011

Check out our updated post on how to get the perfect
social media cover photos;including for the new Google+ Layout.
Download and unzip our Photoshop Template

Step 2:
Open up the template in Photoshop. We've left the images of my face in the template so you can see how it all works - but if you don't want to see my face (and I can sympathise with your position if you don't) then either hide or delete the "Colin" Layers!
Next you'll want to import the image (or images) that you want to use in your own profile.
To do this, select File > Place and select your image file.
Drag and resize it so its in the correct position, and hit enter to place it:
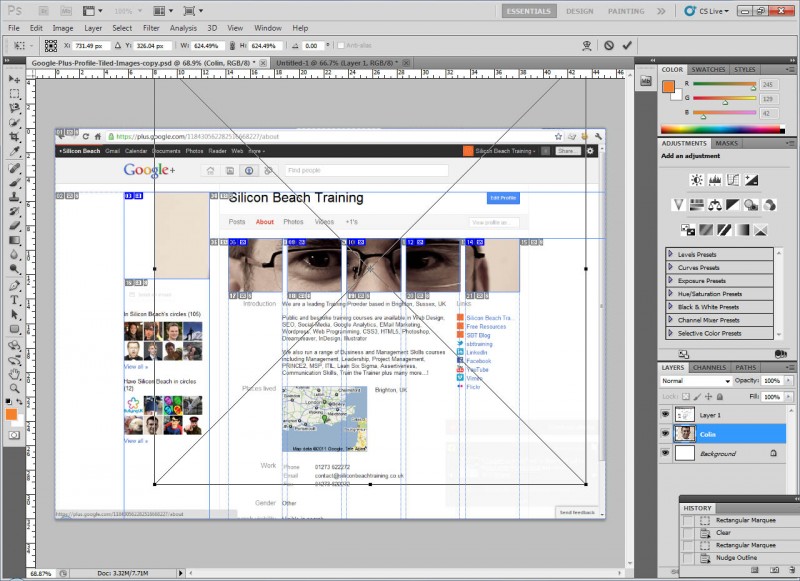
Click on the image for full size version
Aaron Charlie
9 Jul 2011
The web is alight with Google+ fever at the moment, and it seems that Google might have come up with a Social Networking concept that will truly challenge Facebook.
Like everyone else we've been getting to grips with how to get the best out of our profiles.
We've also devised a natty method for customising your Google+ profile design using tiled images.
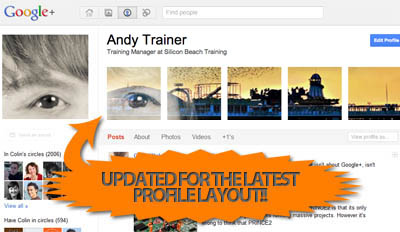
pimp your-google+ profile
And what's more we've put together a Photoshop Template to make it easy to implement for anyone who knows a bit of Photoshop (for those that don't - we run a great 2-day Photoshop course here in Brighton!)
We're sure you can all come up with some brilliant and creative ways of using the method to customize Google+ profiles that really stand out - we'd love to see the results - so if you use our template please post a link to your profile in the comments section so we can check out your work.
If you're on Google Plus - follow us in the following places for all our goodies: Andy Trainer | Heather Buckley
Here's our step by step guide to customize your Google+ Profile using our PSD Template.
NEW - Check out our selection of the most creative Google+ profile designs!
Aaron Charlie
6 Jul 2011
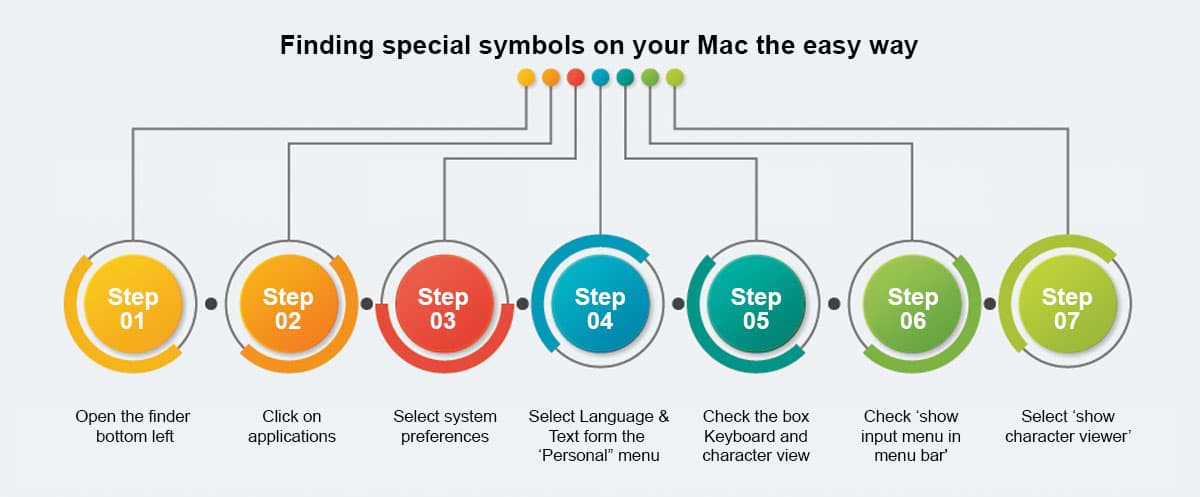
© - Where is the copyright symbol on my Mac?
© - hold alt key & press g
# - Where is the Hash tag on my Mac?
# - hold alt and shift (caps lock) & press 3
% Where is the percentage Symbol on my mac?
For percentage symbol you need to use the character viewer. If this is not shown in the menu at the top right of your screen you will need to enable it.

Heather Buckley
27 Jun 2011
NEW! We've launched our ownResponsive Web Design Course. Learn how to design and build sites that will render on any screen without losing functionality with our best practice workshop. Combine the course with HTML5, CSS3 & JavaScript on our Mobile Web Week and you will be able to build your own sites from scratch!
5 years ago, the only considerations web designers really had to deal with when designing for different users were cross browser testing and different screen resolutions.
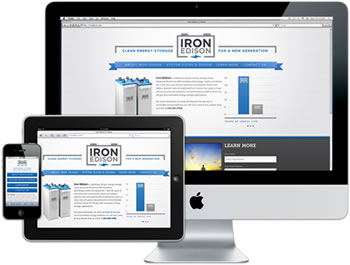 |
Today (and forevermore!), to ensure that your website is truly accessible to all of your users, you have to make sure that your design works for a huge range of mobile devices - iPhones, iPads, Blackberries etc etc... all with different browsers and screen resolutions (many of which are now in 'portrait' orientation, as opposed to the traditional 'landscape' web browser)
One way of doing this is to design a different version of your site for every device - however that's a lot of work.
Enter Responsive Web Design..
What is Responsive Web Design?
Responsive Web design is an approach to web design that ensures that your site responds to your user’s environment, and to their behaviour, based on a range of variables including screen size, platform and orientation.
Rather than create multiple versions of a site for each device - ONE website design will be suitable for all users, by using flexible layouts, images and CSS techniques including media queries. The website adjusts itself to the user - rather than the other way round.
HTML5 and CSS3 are an important part of responsive web design, and as more and more browsers begin to support these technologies responsive websites will become more popular.
Aaron Charlie
20 Jun 2011
How to Comply with UK Health and Safety Legislation

Regardless of complying with Health and Safety laws, providing Health and Safety Training for your staff is something that all businesses should seriously consider.
Sending staff on accredited Health and Safety courses provide a wide range of benefits including reductions in insurance costs, increased productivity and profitability and an enhanced reputation for your organisation.
In addition - all businesses should take some simple steps to ensure you are compliant with HSE (health and safety executive) regulations.
To be fully compliant in terms of training - we'd recommend sending managers on an accredited course - the IOSH Managing Safely Course is available with us.
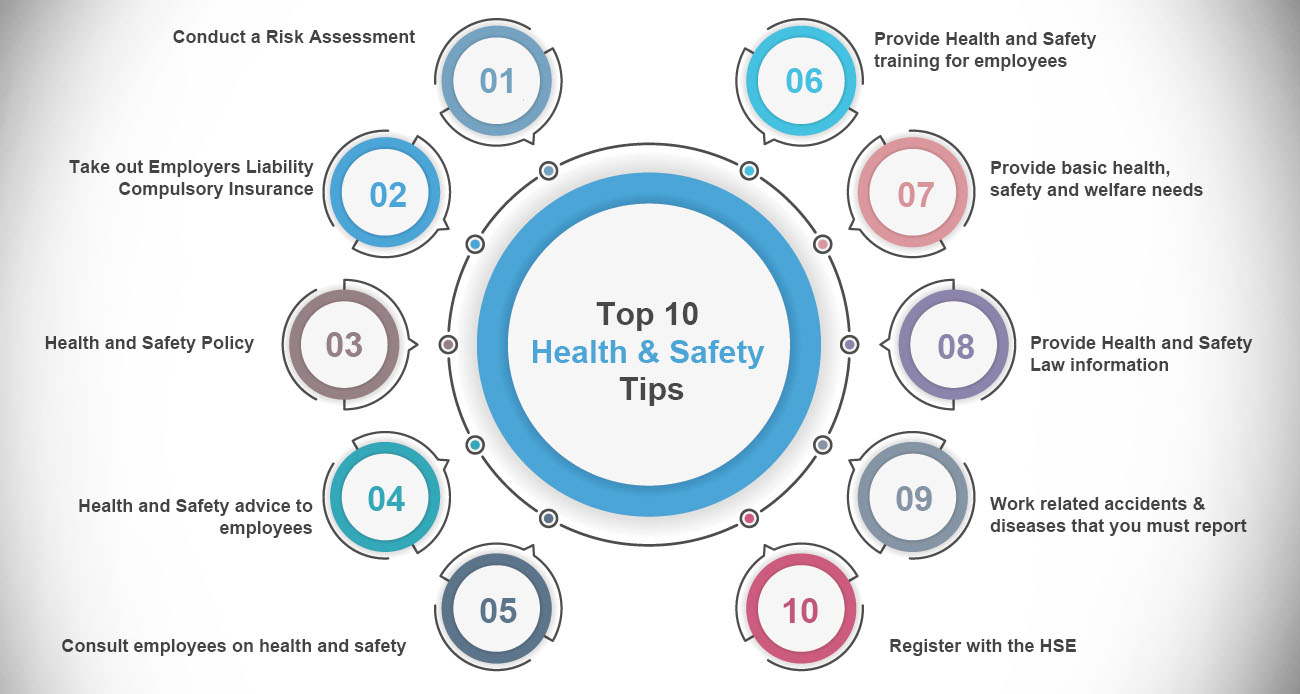
However here are our 10 Health and Safety tips to ensure that your organisation is compliant in the eyes of the HSE
Top 10 Health & Safety Tips
How to Comply with HSE Health and Safety Regulations
- Conduct a Risk Assessment for your workplace and document it - you need to think about what could cause harm, and what precautions you will take to prevent it.
- Any business with employees (so everyone except one-man-bands!) needs to take out Employers Liability Compulsory Insurance - you should display a copy of the certificate somewhere in your office.
- Write down how Health and Safety is managed in your business in the form of a Health and Safety Policy (this is compulsory if you employ more than 5 people)
- You need to have a person or people available in your organisation to provide Health and Safety advice to employees so that they can meet their responsibilities. This could be someone within your business who has received training, or an external consultant.
- You should frequently consult employees on health and safety to ensure that they understand any responsibilities that they have and are happy with the measures you have in place.
- Provide Health and Safety training for employees so that they are aware of the hazards and risks in the workplace and are equipped to manage them. The IOSH Managing Safely training course is a useful programme for all line managers to attend as it leads to a recognised health and safety qualification.
- Provide basic health, safety and welfare needs for all employees. This includes access to toilets, washing facilities and drinking water. These facilities must be suitable for any employees with disabilities.
- Provide Health and Safety Law information for employees to reference. This should take the form of a poster or leaflet displayed publicly in your workplace.
- By law, there are some work related accidents and diseases that you must report if they occur. More details on these can be found on the HSE website
- All businesses that deal with hazardous substances (e.g. explosives, asbestos etc...) or operate in an inherently hazardous industry (like construction) must register with the HSE
Hopefully your business already does all of the above.
If not, and you need some Health and Safety training or advice - please feel free to call us on 01273 622272 or e-mail info@siliconbeachtraining.co.uk
Andy Trainer
15 Jun 2011
How many of you have installed Google Analytics tracking code on your site, but only ever look at the Top Content and Traffic Sources reports?! Sound like you? If so - don't be embarrassed - you're not alone!
However - Google Analytics is about much more than just seeing which of your pages get the most hits, and which keywords are working best for you.

Google Analytics is as much a tool for tracking user behaviour and refining user interface design as it is for monitoring the success of your SEO campaigns. And setting up Goals in Google Analytics is a great way to do this.
Most people know that Google Analytics Goals are there, but don't know how to set them up, or how they can be used. Goals and funnels are covered in our Advanced Google Analytics Training course.
So - as a little freebie here's our beginners guide to setting up Goals in Google Analytics:
How to Set Up a Goal in Google Analytics
What are Google Analytics Goals For?
Before you start setting up any Google Analytics Goals - think about what you want people to do on your site. Do you want them to complete a booking form, or send you an e-mail, or add a product to their shopping cart?
Whatever the user behaviour is that you're trying to achieve is going to be your conversion
Google Analytics Goals are there to track how many times your users convert - and make you money!
What am I tracking?
A very simple goal would just be to count every time someone filled in the booking form, or sent you that e-mail or whatever your conversion is .
However that doesn't tell you anything about how users got to that part of your site, or tell you about the other hundred users who left before they converted (either because the site is badly designed, or your product is too expensive etc...)
Google Analytics allows you to track each stage in the users visit.
For instance, you might want users to enter via a particular landing page, then click on details of a service of product, then fill out the booking form - and a goal will allow you to track each of those stages.
How to set up a Google Analytics Goal
In this example - we're going to track how many users:
1) Visited the Google Analytics Resources page on our site
2) Then looked at the guide to installing Google Analytics Tracking code
3) Then looked at our Google Analytics Training course page
So ...
Log in to your Google Analytics account - now click on edit next to the profile you want to add your goal to:
![]()
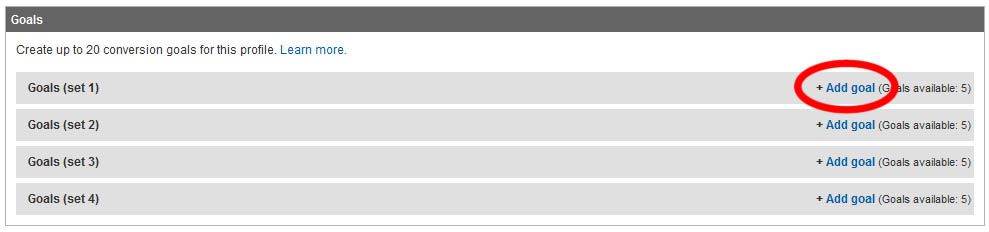
Now on the Profile Settings page - click on Add Goal under Goal Set 1 (presuming you don't already have goals there - otherwise use Goal Set 2, 3 or 4)
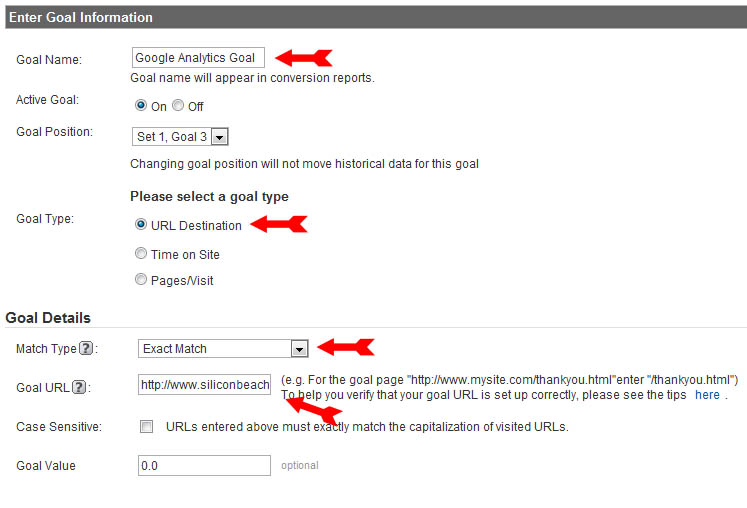
Now under Goal Information - complete the following:
--READ MORE--
Goal Name: Give your Goal a sensible name - e.g. "Purchase Product X", or "Complete Form Y" etc...
Goal Type: Make this URL Destination as this goal is about people ending up on a specific page (you can also set up "time of visit" and "depth of visit" goals)
Match Type: In this example we're setting it as Exact Match as we are counting the number of people who end up on a specific page - however if you want to track how many people who end up on any page within a certain section of your site, use Head Match (see below)
Goal URL: If you're using Exact Match - enter the exact URL of the page that counts as a conversion here. If you're using Head Match, use the first part of the URL only e.g - if you set your Destination URL to www.mysite.com/category-a/, the goal will count anyone who visits www.mysite.com/category-a/page-1/ or www.mysite.com/category-a/page-2/ and so on.
NOTE - Some conversion pages don't have their own URL - e.g. you may want to track how many people complete your order form and press "submit" - but the URL of that form might not change when they press the "submit" button. In these instances you need to either set up a Virtual Page View for when the button is clicked, or use Event Tracking so you can track these goals properly. We don't have room to cover that here - but watch this space as we may treat you to a guide on it later!
Setting up a Google Analytics Funnel
OK - so we've set the Goal URL - which is the page that counts as our conversion - however this will only tell us how many people have hit that page.
By setting up a funnel, we can also track how many users are coming through the pages we want them to, and how many are dropping out.
To do this, click on "Yes, Create a Funnel for this Goal" and you will be given the opportunity to add as many other URLS as Goal Funnel Steps as you like (and name them so they make sense in the report!)
In this instance my funnel starts at our Google Analytics Resources page, then goes to our post on How to Install Google Analytics Code, and finishes off at our Google Analytics Training Course page (which I set as the Goal URL) - so my funnel settings look like this:
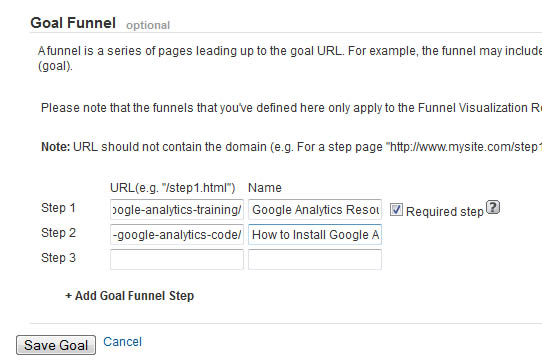
Now save your goal - and wait for the results to start flooding in!
Looking at your Goal Reports
Just after you've set up your goal you're not going to have any data - but after a few days and you'll be able to see how many conversions you've achieved. To do this - go to the main dashboard for your profile and click on Goals (at the bottom)
If you have more than one goal set up, the first thing you'll see is a total conversions graph (which is all goals added up) - to see the number of conversions for each goal, click on its title and you can drill down in to the results.
To see your Funnel - click on the "Funnel Visualisation" option, and you'll see something like this (not much data at the moment!):
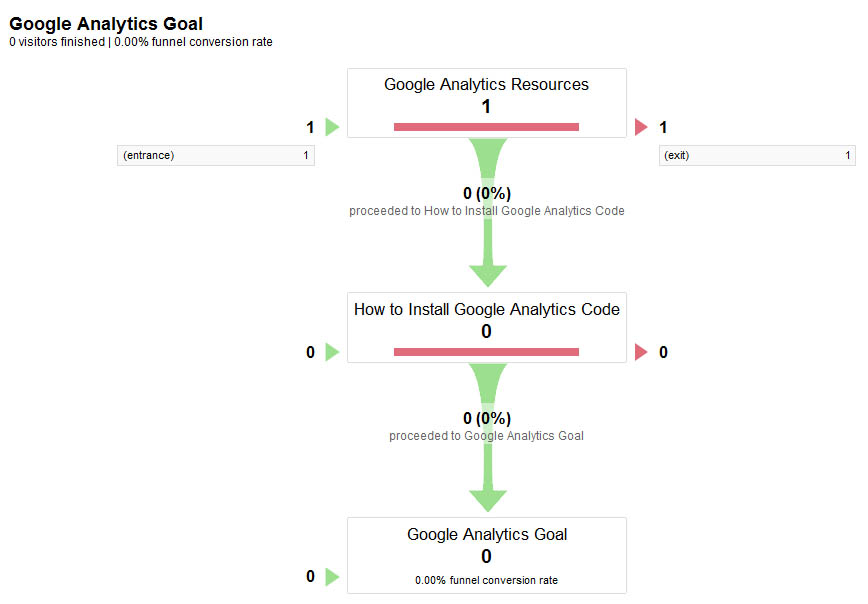
OK - so at the moment we've only got data about one visitor (and they left straight away!) However in time funnels become a really useful ready-reckoner to let you know how many people are making it all the way through your sales process to buy something - and if they're not, at which point most of them are dropping out, so that you can redesign your pages or adjust your product pricing to achieve more conversions.
Best practice is to start making changes from the bottom of the funnel up - i.e first try to increase the number of conversions for people who are nearly getting there - and then work your way up!
Good luck - and happy funneling!
Aaron Charlie
6 Jun 2011
Thank you to everyone that entered our Environment Photography Competition - as ever the standard of entries was exceptional and our judge Martin Bailey spent an agonising weekend judging them all for us.
So - the moment you've all been waiting for!
Thanks to Pete Davies (AKA @petedaviesmusic) for providing the music.
Aaron Charlie
3 Jun 2011
 Need Any Help?
Recent Blogs
 Enquire Now


