 Enquiry Now

 Contact Us


 Check Out
 +44 20 4571 2395

 PRINCE2® Foundation and Practitioner Training


Microsoft Project 2010 was released last year and many of our clients are upgrading to the new version. Our guest blogger this week is one of our MS Office trainers and she has put together a list of some of the bugs in Project 2010 and (most importantly!) ways of getting around them. In time these bugs will be ironed out with updates but for the time being they can be extremely frustrating if you encounter them.
To learn more about the Office Suite of products, see our Microsoft Office training courses, including MS Project training, Beginners Excel training and Advanced Excel training. If you are upgrading from a previous version, our Office 2010 Upgrade training course covers all the new features in Office 2010.
Bugs in Microsoft Project 2010
As a Microsoft Project trainer I was interested to see the new Project 2010 and how it compares to previous versions. I am always keen to find out what’s new with an application and what benefits it can bring to the users that I train, and how best to communicate these features. There are some great new features such as:
- The Team Planner - this enables you to click and drag work from one resource to another.
- The ability to use the drop down list in the Resource Names column in the Gantt Chart table to select more than one resource.
- An icon in the Indicators column in the Gantt chart table to indicate over-allocations. This saves you having to go a view such as the Resource Sheet to check for over-allocations.
- The ribbon interface which matches the other MS Office applications.
Whilst working with Project 2010, various bugs came to light and a quick “google” and a chat with some other Project trainers reassured me that it isn’t something that I am doing wrong and that I am not the only one to have discovered these problems. For the most part, these bugs affect the display only and if you dig deeper into the detail in other views, the data in the background is correct.
Look out for the release of the Service Pack, but in the meantime, here is a description of the bugs that I have discovered and my suggestions of how to get around them:
 Andy Trainer
 25 May 2011
As part of our Lean Training and Six Sigma Training courses we often use Lean Games to illustrate key points.
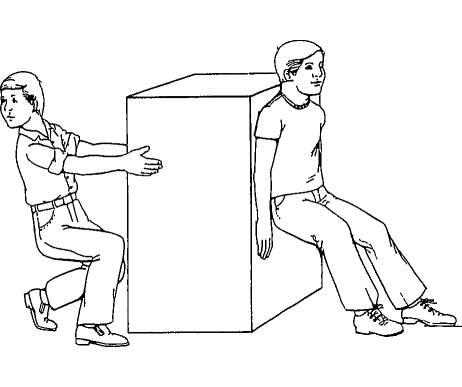 As well as being a great Six Sigma training aid, if you're trying to make a business case for adopting Lean or Six Sigma within your organisation, these games are a great way of demonstrating the benefits of Lean and Six Sigma Tools in a practical way.
If you're interested in Six Sigma training, check out our Lean Six Sigma Green Belt Training course, which is suitable for anyone who will be leading a Six Sigma project. If you need more basic introductory training, our Lean Six Sigma Yellow Belt course may be of interest.
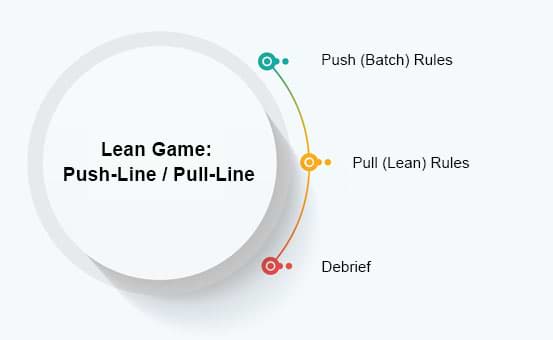
Here we describe the Push-Line / Pull-Line Lean game...
Lean Game: Push-Line / Pull-Line
This Lean Game takes around 25-30 minutes to complete. It's purpose is to highlight the advantages of the Lean approach to assembly lines (pull) over the batch approach (push).
Andy Trainer
24 May 2011
CSS3 and HTML5 are changing the way we use the web, and how programmers and web designers build sites. Web browsers are quickly becoming compatible with HTML5 and CSS3's new tags and features, which are opening up a whole new world of possibilities.
One of those possibilities is the use of Responsive Web Design. In a world where mobile web browsing is ubiquitous, Responsive Web Design techniques allow designers to use flexible grids and page layouts in sites that will respond to user behaviour and adjust automatically to the user's browser capabilities and screen resolution of their device (meaning you don't have to make a different version of your site for every mobile phone and tablet out there). We'll be writing more about Responsive Web Design here soon (so watch this space!)

In response to the increase in demand for these skills we're now running regular HTML5 & CSS3 Training courses here in Brighton - the two 1-day workshops are scheduled together and can be booked together as a package. We're also running regular JavaScript Training and jQuery Training courses.
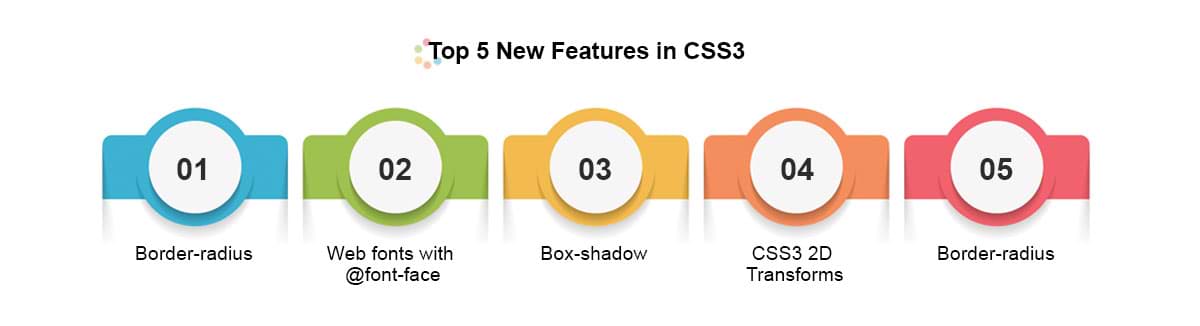
To give you an idea of some of the exciting new things you can do with CSS3 - here's our favourite 5 new features in CSS3, along with links to relevant CSS3 Examples.
Top 5 New Features in CSS3
1) Border-radius
The new border-radius feature in CSS3 comes as a great relief for anyone who has had to create rounded corners with corner images and extra DIVs: all you need is a few lines of CSS. It's not yet supported by IE7 and IE8, but you can use a CurvyCorners Script for these browsers.
CSS3 Border Radius Example
Aaron Charlie
23 May 2011
Agile principles are now being applied to software development, software testing and project management, but what are the basic principles that Agile is based on?

All Agile methods were designed around a simple premise; the smaller the project, the greater the success rate. For agile to be successful it must be both quick and simple.
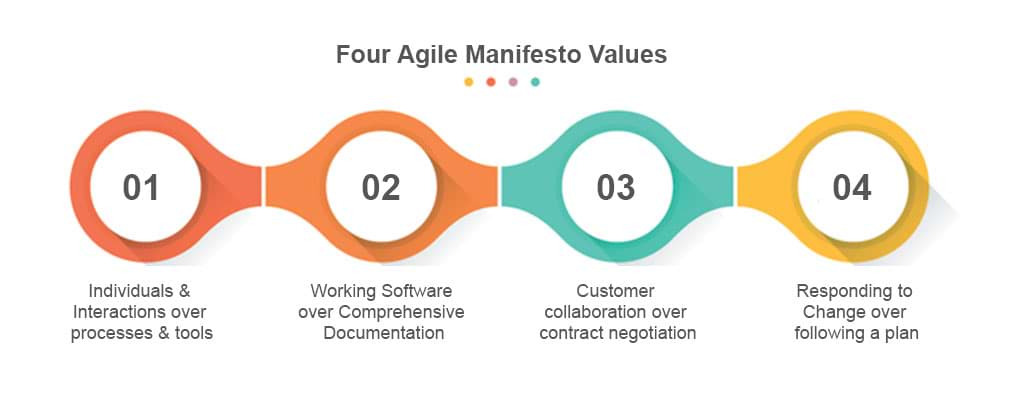
In 2001 the Agile Manifesto was born. Representatives from several Agile methodologies (including SCRUM, eXtreme Programming & DSDM) came together and devised a set of values and principles that any Agile methodology should adhere to. These values and principles would increase the success rate as projects would be constantly revised to meet customer requirements.
We now offer the Certified Agile Project Management Training, please see our Agile Project Management Foundation Training and Agile Project Management Practitioner Training courses.
Andy Trainer
20 May 2011

We have created our comprehensive downloadable PRINCE2® Practitioner Exam Tips eBook to help delegates who will be taking the PRINCE2 Practitioner examination.
Just knowing the PRINCE2 syllabus is not necessarily enough to get you through the PRINCE2 Practitioner Exam – learning some good exam techniques can significantly increase your chances.
This guide is used by delegates on our PRINCE2 Practitioner Training course and we have now made it available to download here for all those who are interested in the PRINCE2 Practitioner Qualification.
Please note that this guide alone will not prepare delegates to sit the PRINCE2 Practitioner Exam! It is intended to be used in conjunction with our PRINCE2 Training courses. We offer both thePRINCE2 Foundation Training course andPRINCE2 Practitioner Training course.
In this guide you will find helpful hints on how to manage the booklets and read the information you are provided with, as well as how to manage time during the examination, and some techniques you can use for answering the different styles of questions.
We hope that this will be a helpful guide for completing the sample PRINCE2 Practitioner papers you will be provided with. If you have any of your own tips you would like to add - feel free to add them in the comments section below.
For more help learning PRINCE2, download our other project management eBook Managing a Project - Getting Started.
Andy Trainer
13 May 2011
Silicon Beach Training now offers the increasingly popular range of Agile Project Management training courses – but what is Agile Project Management, and why is it such a big deal all of a sudden?

In March 2011 the government unveiled its new ICT Strategy which identified a number of problems (or challenges using their words!) with the method in which IT projects and programmes were managed and delivered, causing them to fail. The first of these challenges being:
- "projects tend to be too big, leading to greater risk and complexity, and limiting the range of suppliers who can compete"
Silicon Beach Training now offer accredited Agile Project Management training, including the Agile Project Management Foundation course and Agile Project Management Practitioner course.
For example, if a project to implement a large IT system is deemed to take 5 years to complete, it is very likely that, in those five years circumstances (e.g. technology, customer and business requirements, even governments!) will have changed, rendering the final solution based on the original specification unfit for purpose.
A number of strategies were identified to address these challenges, one of which is “by the application of lean and agile methodologies that will reduce waste, be more responsive to changing requirements and reduce the risk of project failure”.
Agile methodologies have been used in software development for some years, but are now being applied in project management as they offer a flexible process that can change according to the customer or organisational needs.
How does Agile Project Management differ from traditional project management methodologies?
Traditionally a project manager may direct the project team using a 'command and control' style, actively directing their team towards the work that must be completed. Agile project management uses a different technique. At the beginning of an Agile project, a high-level plan will be created by the project manager, which is based on basic requirements and a high-level vision of the solution. From there on the final project is created iteratively and incrementally, with each increment building on the previous increments. Agile Project management also differs in the way that team members create the plans for each increment, rather than the project manager themselves.
Andy Trainer
11 May 2011
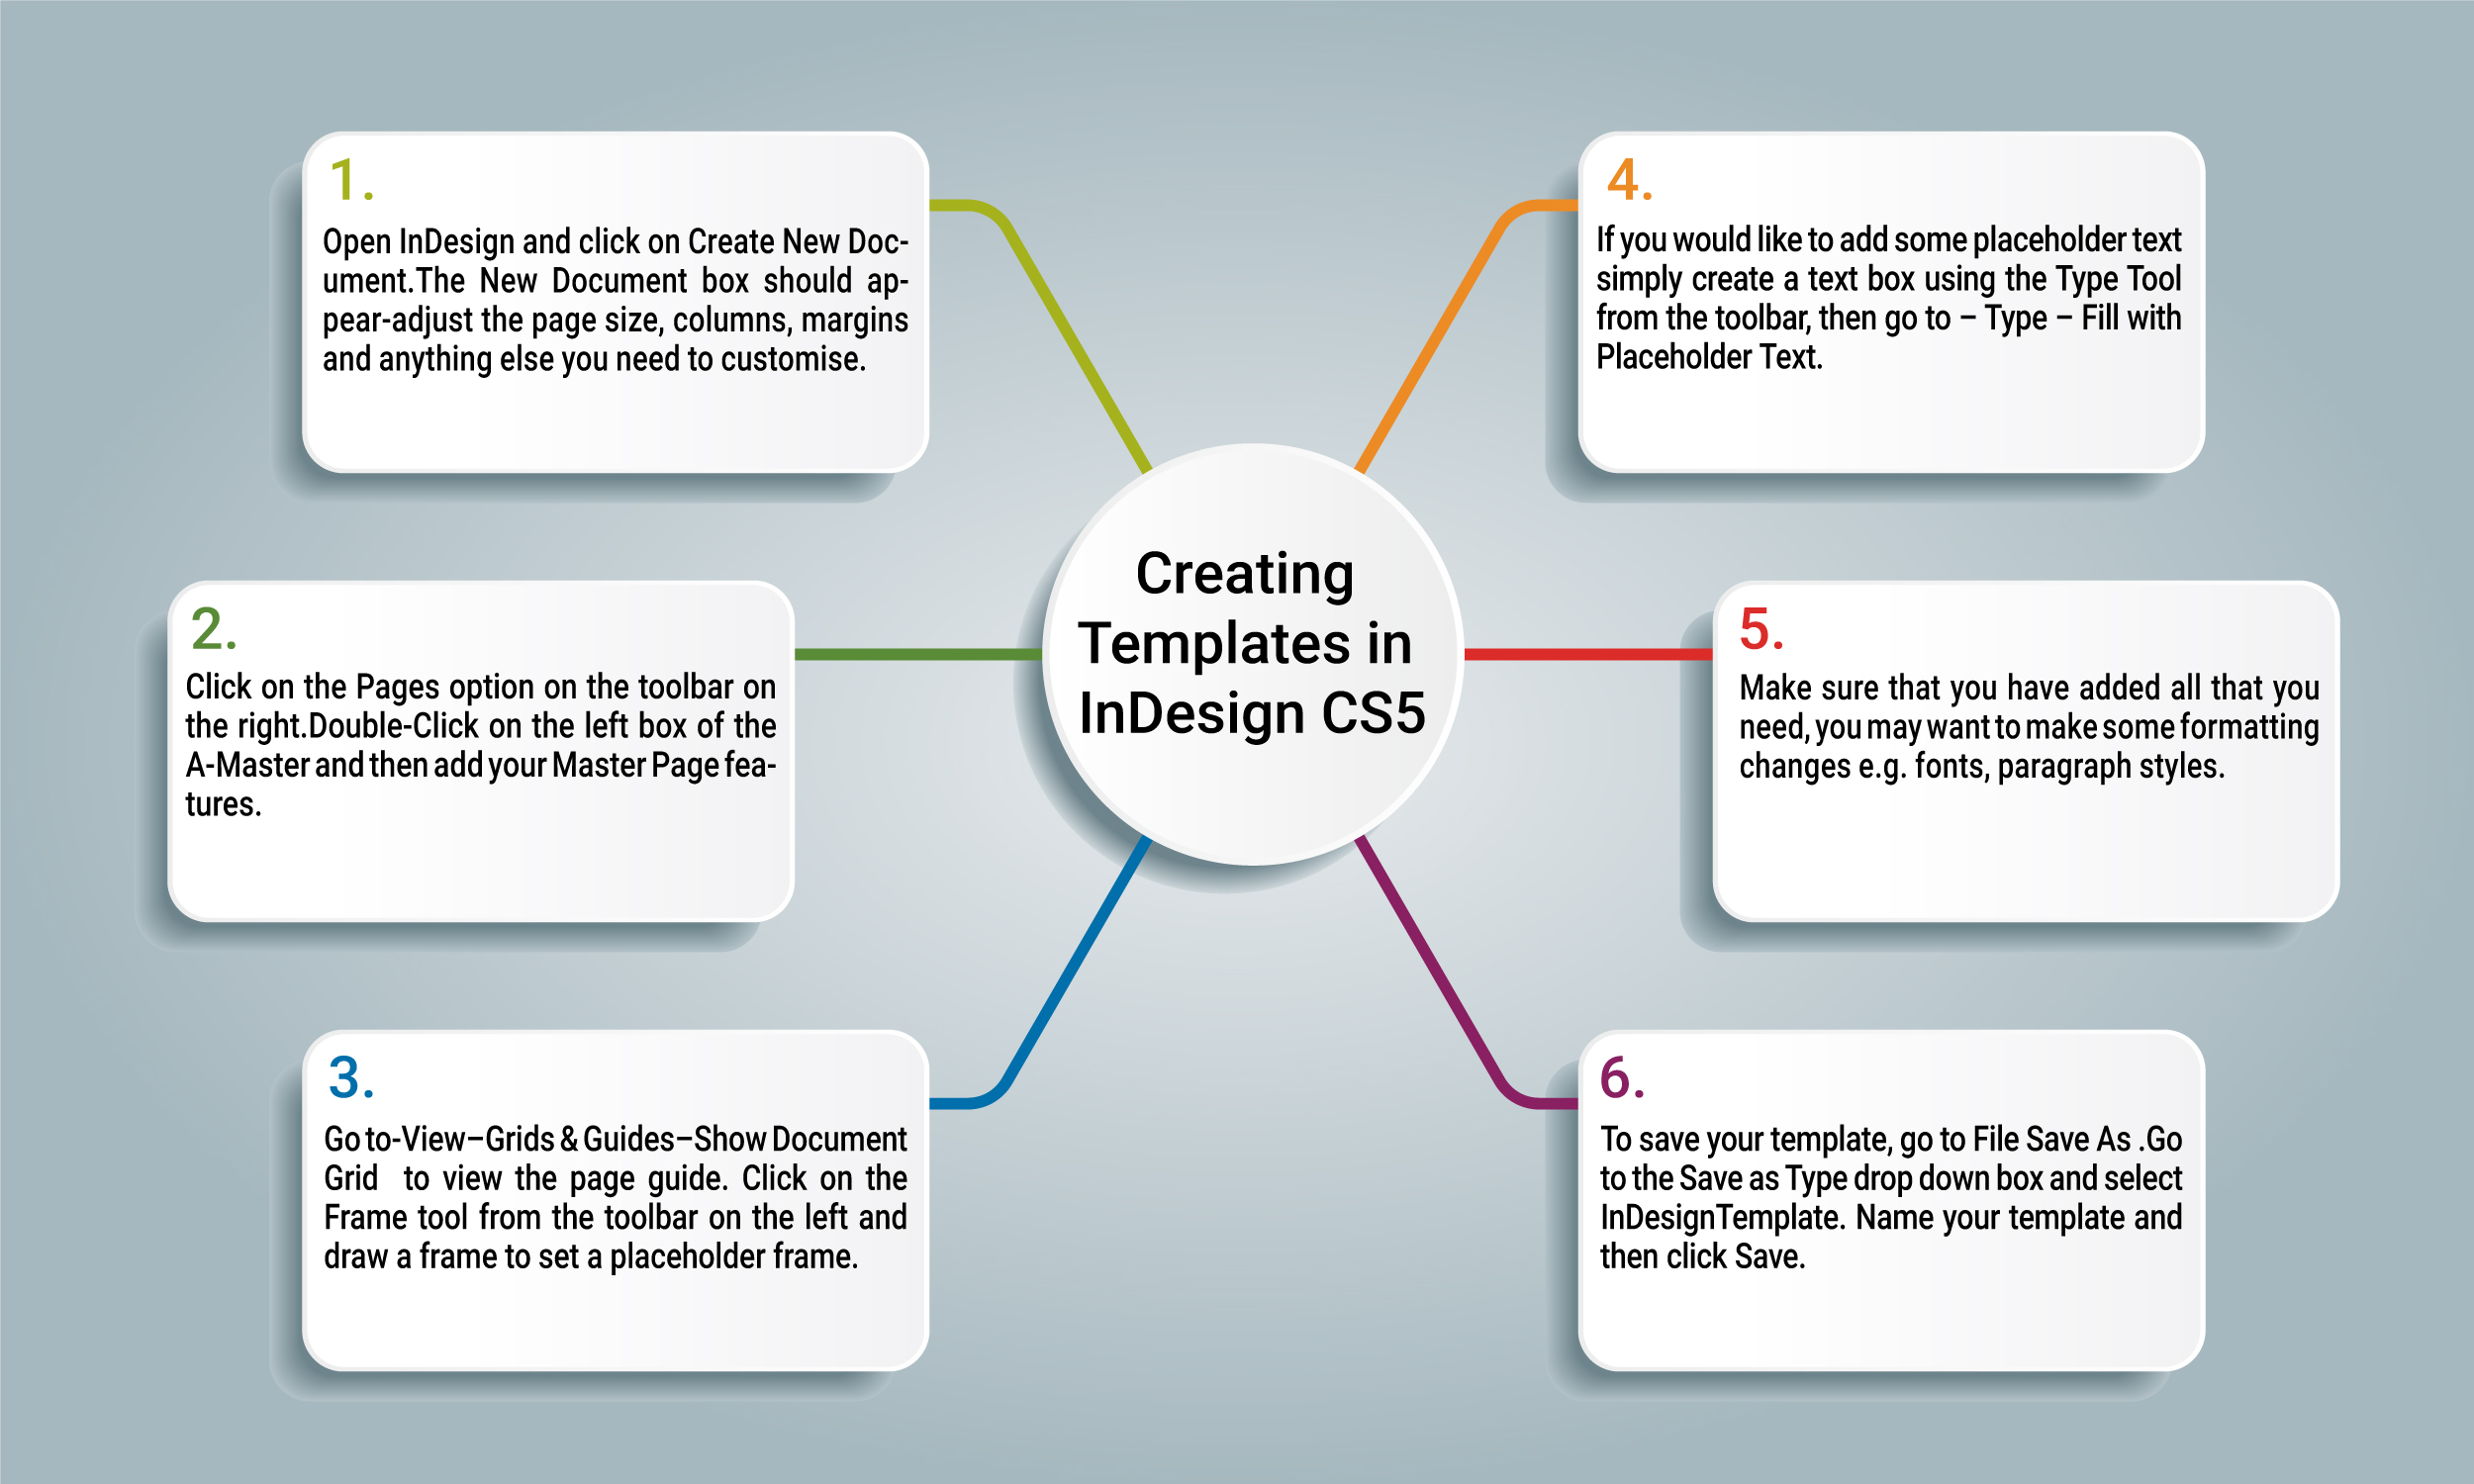
One of the things we're most commonly asked on our InDesign Training courses is how to improve workflow and save time using InDesign. One of the best ways to do this is to create and use InDesign Templates. This is especially useful if you're creating very similar InDesign documents over and over, and don't want to have to start from scratch each time.
In this simple InDesign training tutorial, we show you how to create InDesign Templates using InDesign CS5.
If you need really comprehensive tuition on using InDesign

CS5, we run regular InDesign training courses. We also run regular Photoshop Training, Illustrator Training and Flash Training courses.
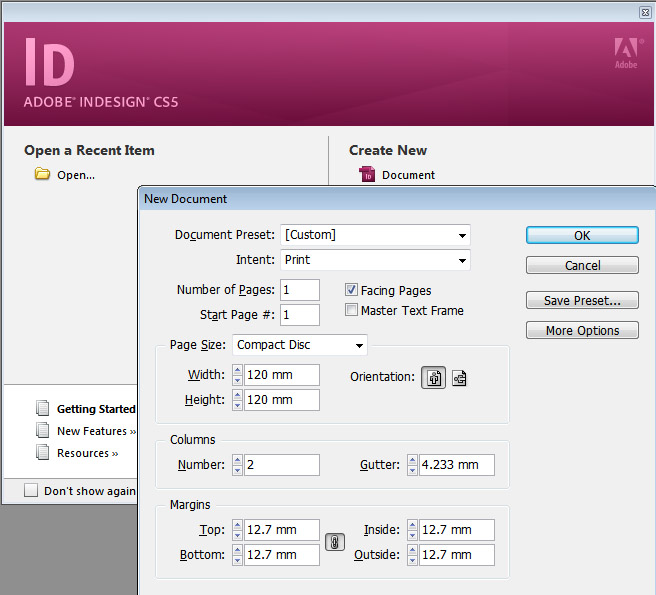
InDesign CS5 Tutorial: Using InDesign Templates
1.Open InDesign and click on Create New Document. The New Document box should appear- adjust the page size, columns, margins and anything else you need to customise. Click OK.
Aaron Charlie
6 May 2011
|
There are many different ways to draw maps - including photographic techniques and of course old fashioned hand drawing. However if have some Adobe Illustrator skills, using its vector drawing tools is a great option, as it means your maps will be fully scalable - you could blow it up to A0 size without losing any quality. Within Illustrator there are many If you would like to learn more about Illustrator, then come along to our Illustrator Training course in |

Brighton, Sussex. If you already know Illustrator quite well, you may want to have your own private Advanced Illustrator Training. We also run regular Photoshop Training and InDesign Training courses.
An Illustrator map will provide artwork which is razor sharp, scalable, supporting industry standard colours such as Pantone for print and HTML for web.
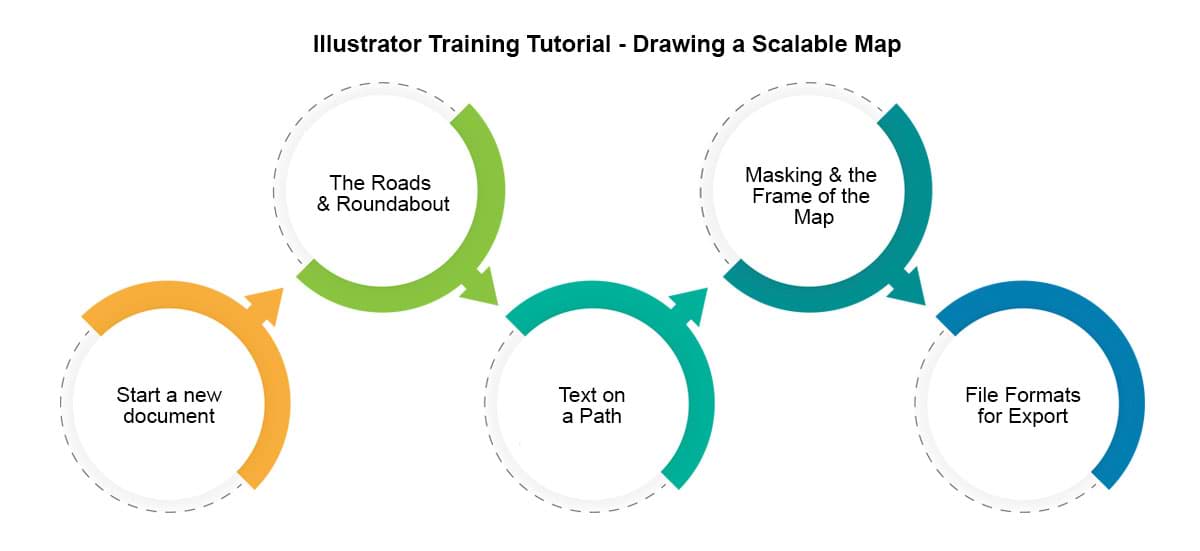
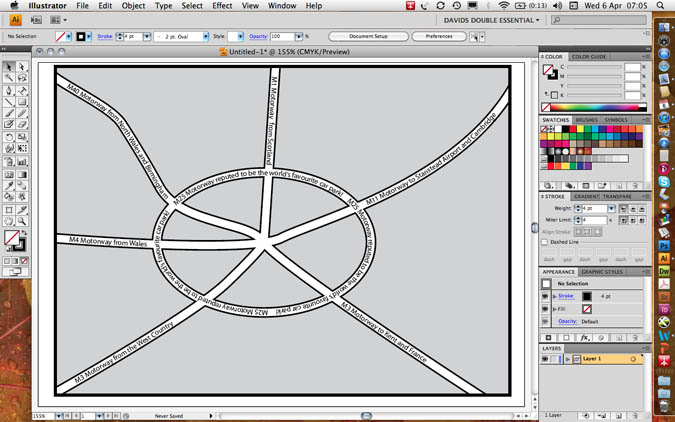
Illustrator Tutorial: Drawing a Scalable Map in Illustrator CS5
Output Formats
The final format you should export your document in is .EPS for print or GIF for the web. To insert the map into PowerPoint, you might export the map as a JPG at high to maximum quality.
Here is an example of our finished map
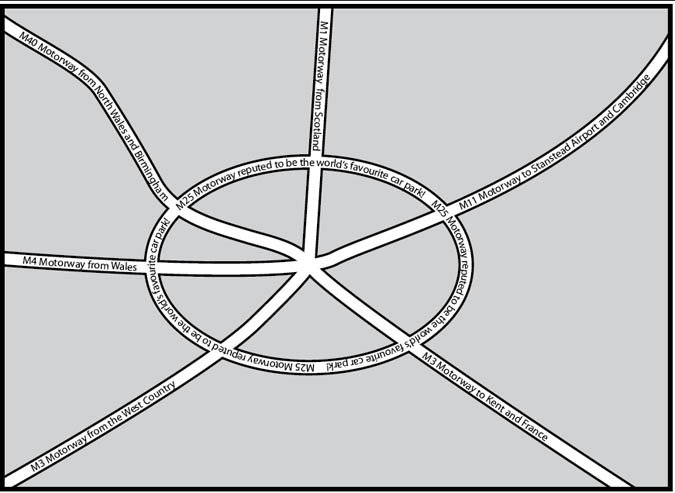
As you can see it does not pretend to have any cartographic or scale accuracy but it is very clear to read and can be simplified to clearly show the way to an office or point of interest, etc.
Tracing over a scan
If one wanted to preserve the accuracy of a previously drawn map, one would need to open a photographic version of another map (a screen grab or a scan), define the layer as a template layer, create a new layer for the new artwork and draw over the scan, keeping the curvature of the roads perfectly accurate. This will be the subject of a further lesson.
N.B. Scanning a map requires permission from the copyright holder.
--READ MORE--
Start a new document
File menu / new or (CTRL+N/ CMD+N)
A5, landscape, no bleed, print or web profile as required by you.
The Roads and Roundabout
Illustrator draws lines in a number of ways: the line tool, the pencil tool and the pen tool.
Use the line tool for separate straight lines
Use the pencil tool for freehand and often wobbly lines
Use the pen tool to give continuous lines of accurate corners (a click), or lines of a precise curvature using industry standard vectors (click drag).
Colours in Illustrator are applied to the Fill (the inside colour of the object) or the stroke (the line going around the edge of the object).
The roads in this map will have a stroke of either black or white, but a fill value of none - the “no entry” colour in the toolbar, the swatches or colour palettes.
It is best to draw the roads with a stroke of one point black.
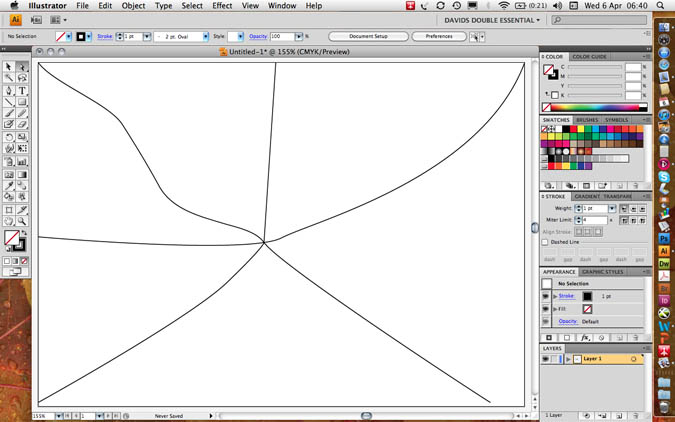
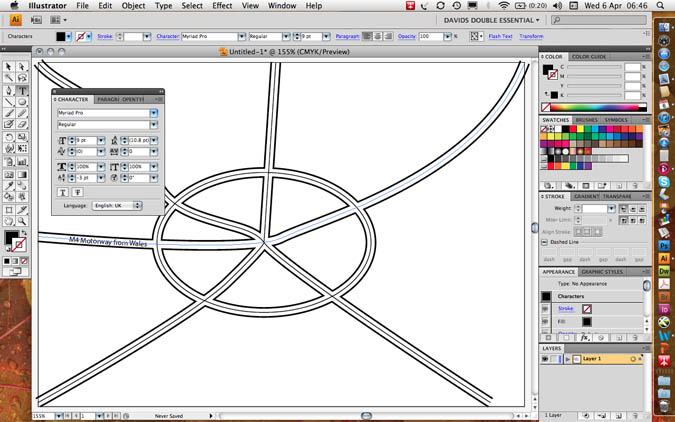
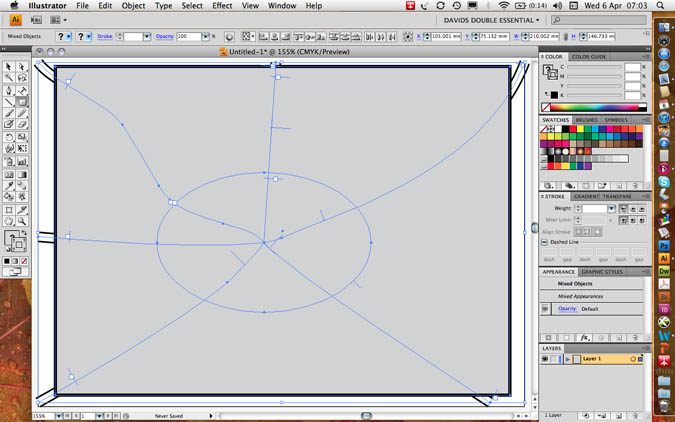
Draw four or five roads, which intersect at the centre of the map.
Make them extend further than the finished frame of the map.
Notice that when you use the pen tool, a click creates a corner point whereas a drag creates a curvature: drag down for an upward curve and vice versa.
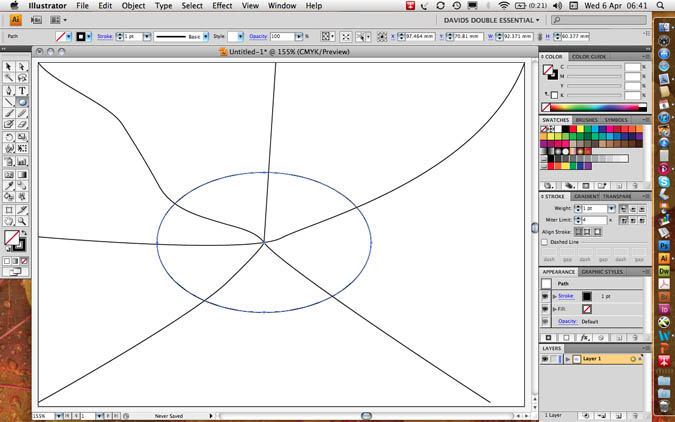
Make a roundabout using the ellipse tool - no 3 in the shape tools. Using the alt key will originate the road from its centre, not from its first clicking point.
Your artwork should look something like this…
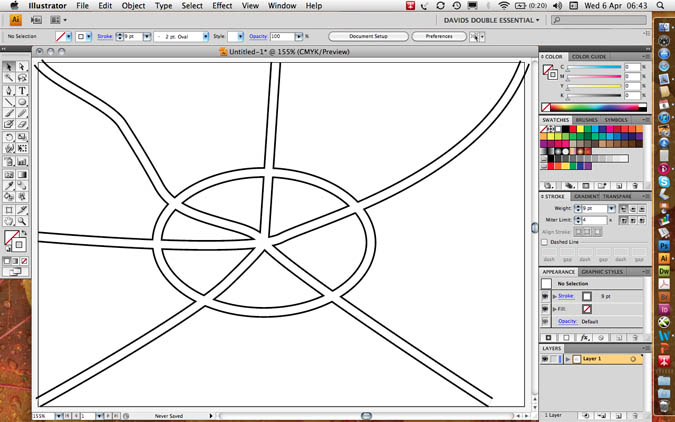
Increase the stroke weight to 13 points and make sure your artwork has a fill value of transparent so that the curves in the roads do not fill in with an opaque solid colour.
Group all the roads (select all CTRL+A / CMD+A then group CTRL+G / CMD+G)

Copy (CTRL+C / CMD+C)
Do not paste (CTRL+V / CMD+V) as this will put a duplicate in the middle of the page; paste in front (CTRL+F / CMD+F) which will make a duplicate exactly in front of the previously copied artwork.
Set the stroke of the new roads down to 9 points and colour them white. This will give you 2 point pavements which neatly interconnect with each other!
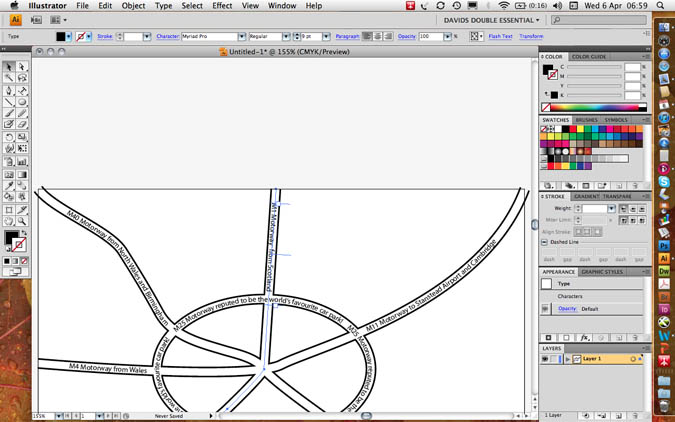
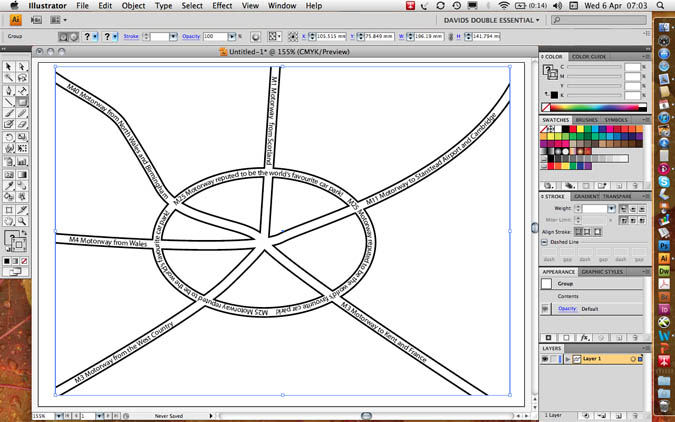
Text on a Path
Paste in front (CTRL+F / CMD+F) one more time to provide a grid of black roads. When you click on a line with the third Text Tool (text on a path) the fill and stroke values of the roads will disappear and the type will take on the same direction as the roads, however curved or cornered.
Open the Type Character palette (CTRL+T / CMD+T) from the Type menu or the Window/ Type and tables menu.
Set the type size small enough to sit within the road and use baseline shift (bottom left in the character palette to a negative value so that the text sits in the middle of the road and not on top of it. I used a 9 point line with a minus three point baseline shift in the following example.
The first accurate setting of type characteristics will set a precedent for all of the other roads.
If you want text to go in two different directions on the same path at the same time you will have great difficulty. It is correct to duplicate the line itself; use one line for upward text (e.g. my M4/M11) and a separate line for downward text (my M1)
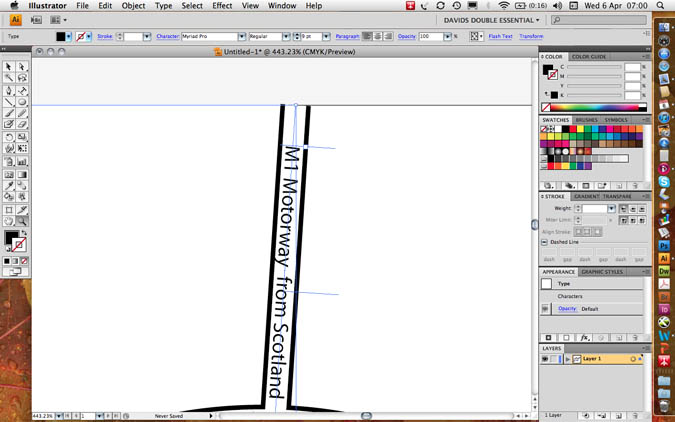
You will find three text I-beams: the start, the centre and the end point. By dragging the centre point around the end of a line, you can invert its direction.
Masking and the Frame of the Map
Masking
Group all the roads and the text: Select all CTRL+A / CMD+A then group CTRL+G / CMD+G.
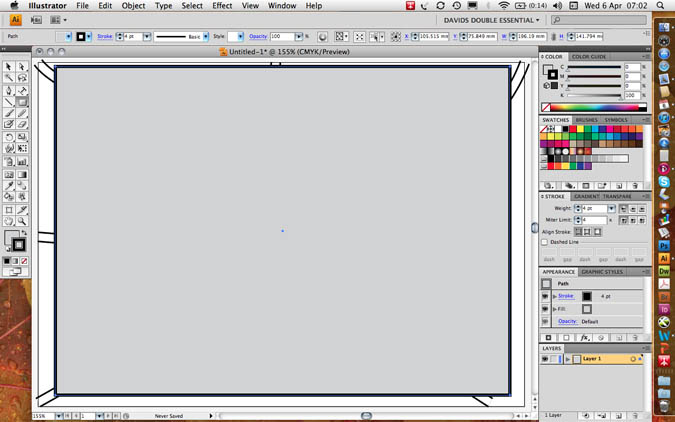
Make a rectangle with the rectangular shape tool which is exactly the same size as the finished map. Please ensure that road ends protrude off each edge.
Give the box a fill value of 20% black and a stroke value of 4 points black.
Copy the box to the clipboard: CTRL+C / CMD+C
Select both the roads and the box.
Go to object menu/ clipping mask/ make to include the map and exclude the overlap. This is what is meant by a “clipping” mask – like scissors.
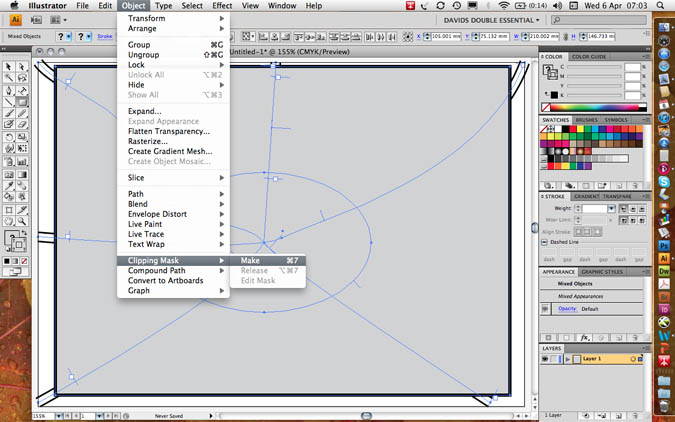
You will notice that the box no longer has any stroke or fill value rather similar to text on a path.
Now paste a copy of the box behind the map with edit menu/ paste behind CTRL+B / CMD+B.
Set the stroke value to 0 points but keep the fill at 20% black.
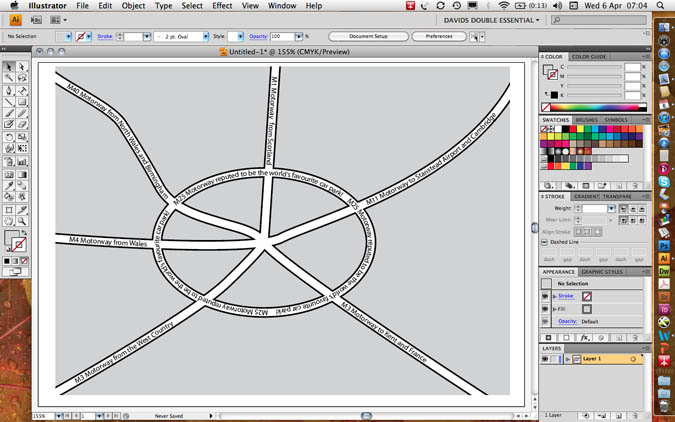
Next paste a further copy of the box in front CTRL+F / CMD+F and set the fill value to transparent but keep the stroke value at 4 points black to make a neat frame as in the following example.
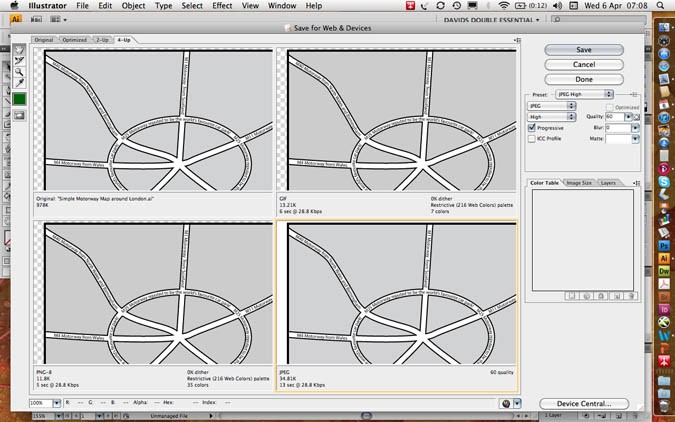
File Formats for Export
The .EPS Encapsulated Postscript is the most used file format for the printing industry.
It is best practice to keep the version as the latest version with an 8 bit preview for on-screen visibility.
File Formats
Most printing programs accept Illustrator’s .EPS file format, encapsulated Postscript. This format supports background transparency and is infinitely scalable to any size up or down.
I tis never pixelated as the file format is composed of mathematical vectors, lines and curves, and not pixels as found in photographs.
To output files for PowerPoint the bitmap .JPEG format is often preferred. You cannot save as to a photographic file format, but instead should go file menu/ export to JPEG, choosing high to maximum quality.
To output files for Web use, go to: file menu/ export for web and devices.
Here you could chose .PNG for web transparency, .GIF for logos or .JPEG.
You can choose optimisation values by choosing a 4-up preview.
Aaron Charlie
5 May 2011
 Need Any Help?
Recent Blogs
 Enquire Now


