 Enquiry Now

 Contact Us


 Check Out
 +44 20 4571 2395

 PRINCE2® Foundation and Practitioner Training


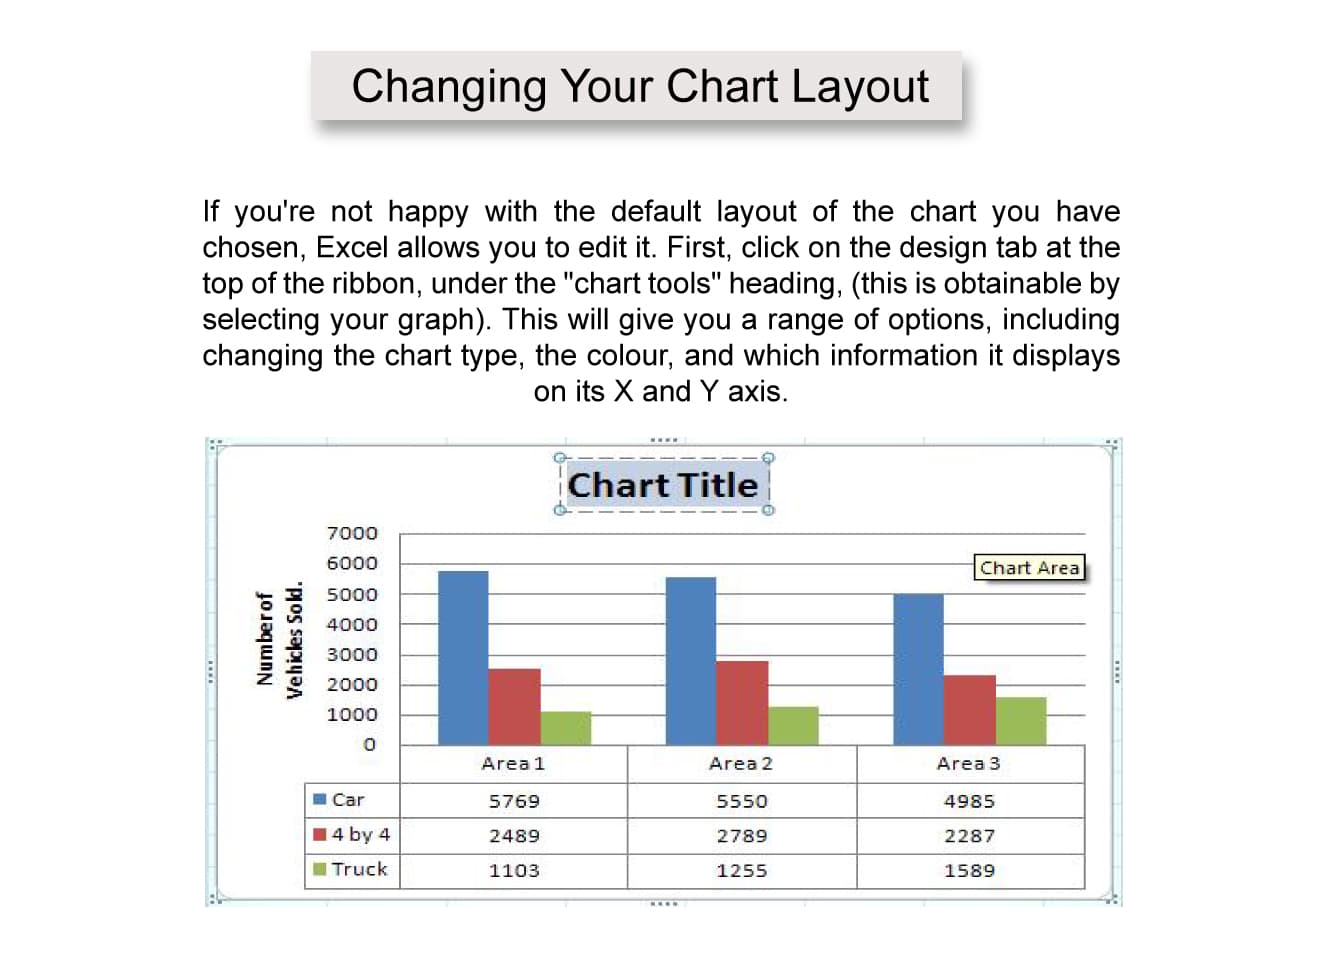
If you're not happy with the default layout of the chart you have chosen, Excel allows you to edit it. First, click on the design tab at the top of the ribbon, under the "chart tools" heading, (this is obtainable by selecting your graph). This will give you a range of options, including changing the chart type, the colour, and which information it displays on its X and Y axis.

In our example, select is layout 5. Excel 2007 will change your graph so that it now shows a main title, a title for the Y axis and a table of all the information used in the graph underneath the X axis.
In order to change the main title and the Y axis’ title all you need to do is to double click on the title itself and retype it.

 Andy Trainer
 6 May 2009
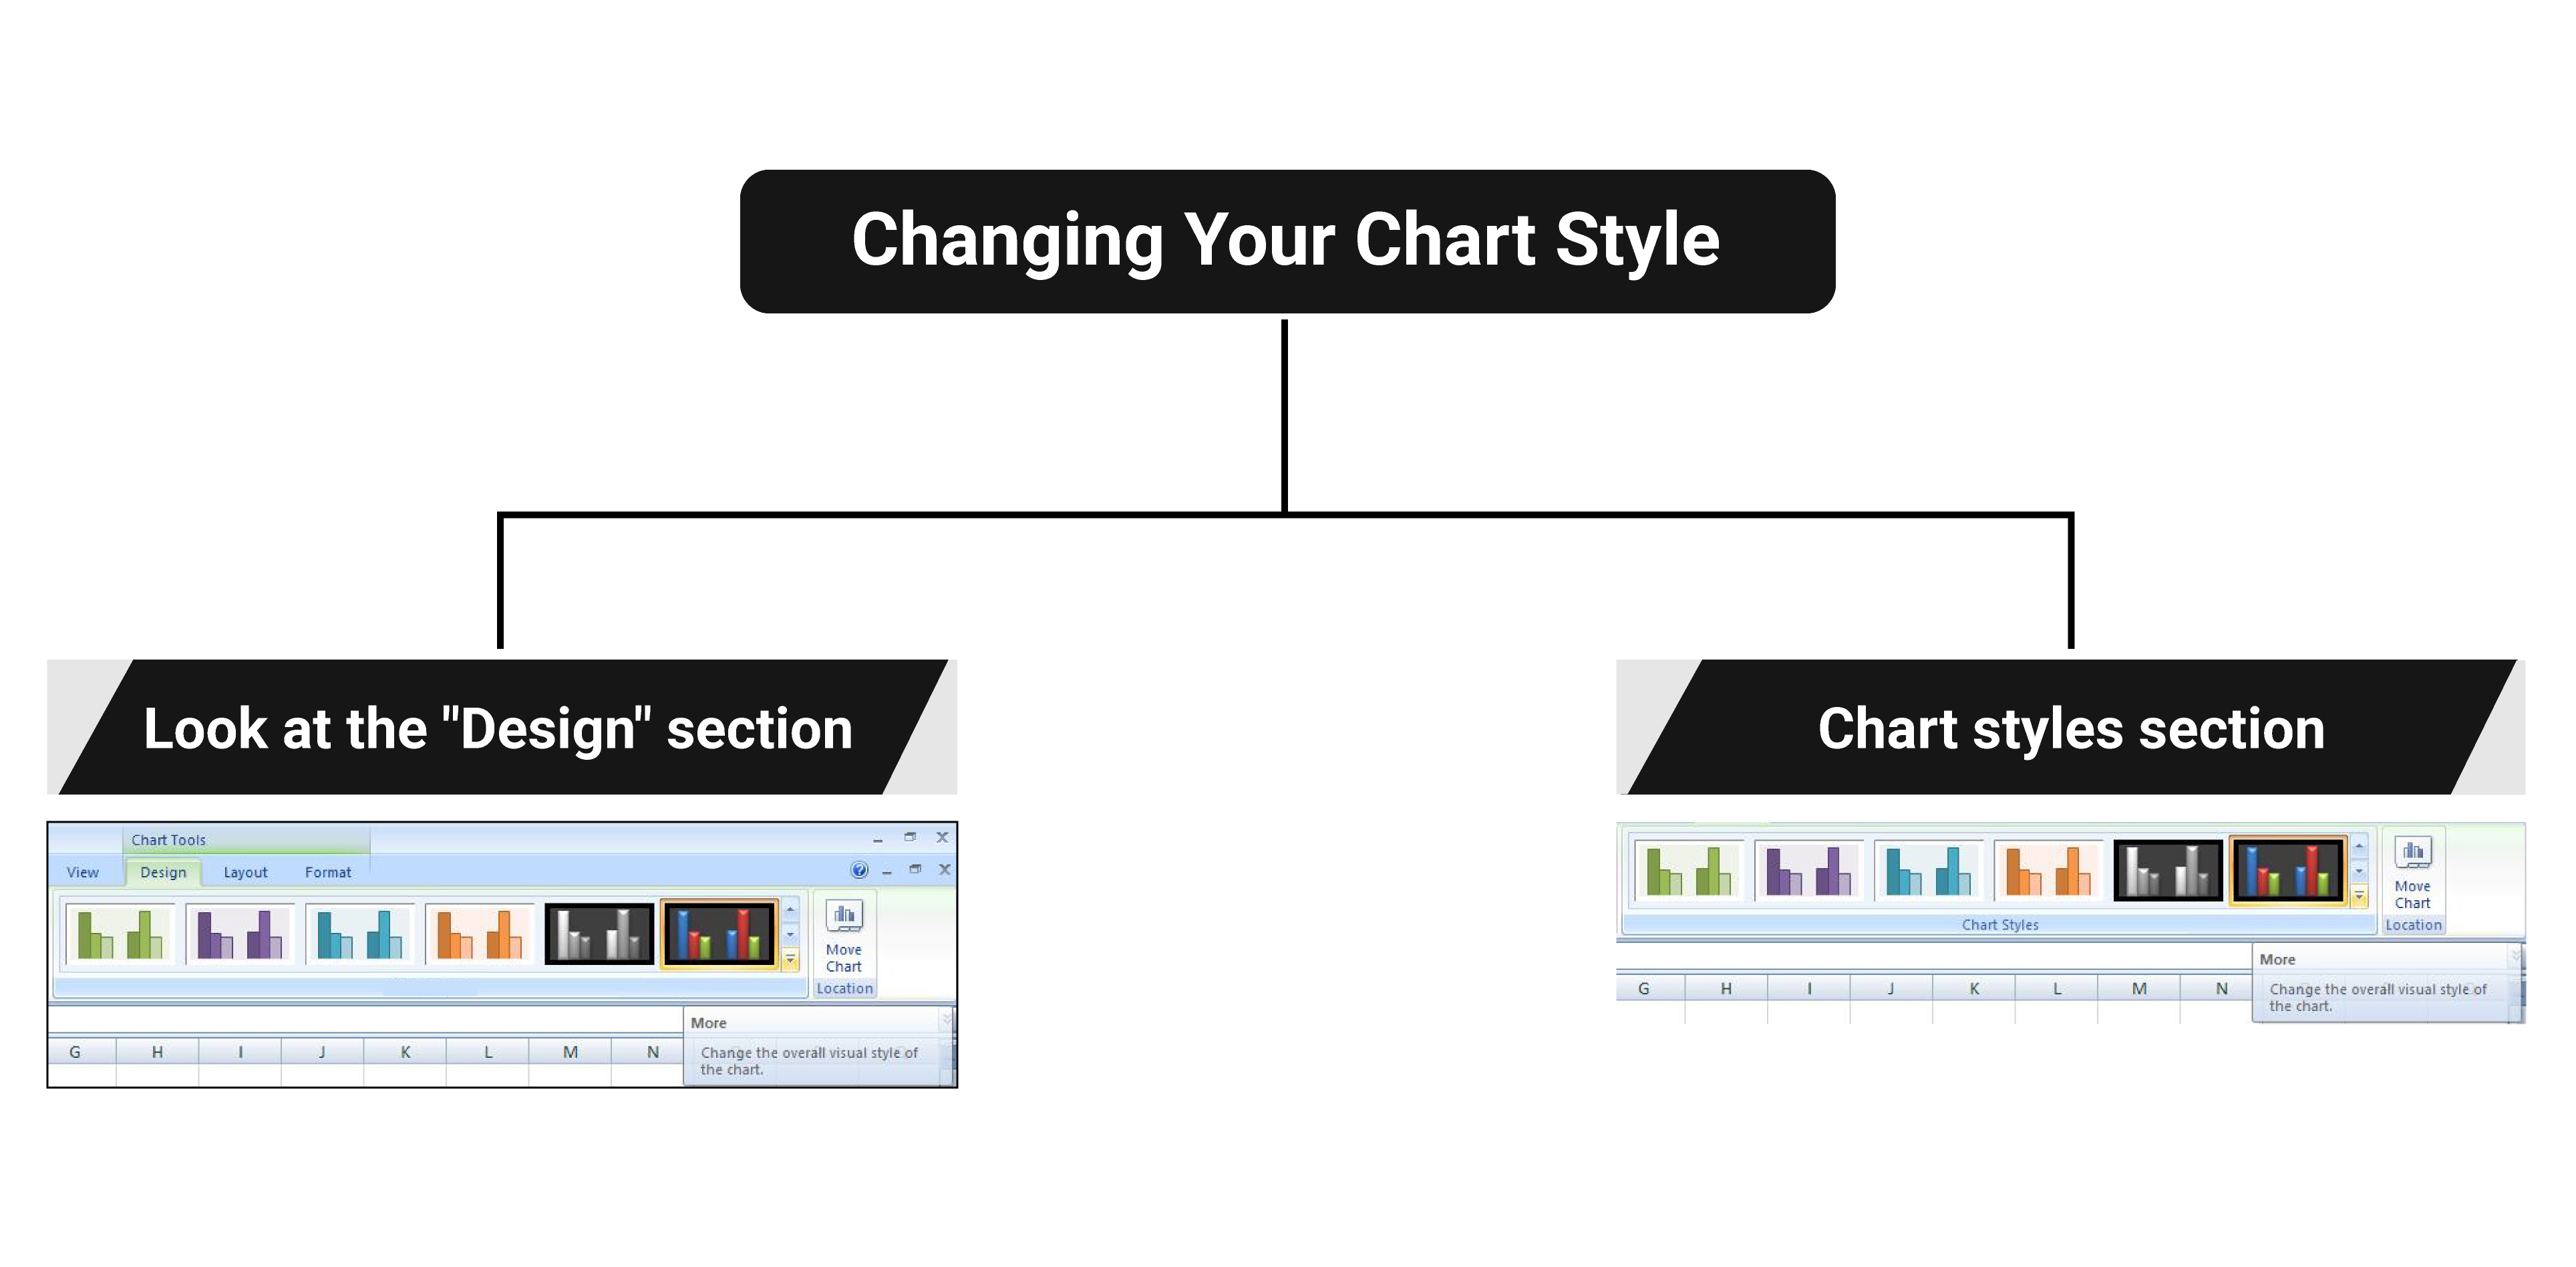
Once you're happy with the chart type, you can also change the style so that the colours and fonts fit with the image you want to portray.
Again - select your chart and look at the "design" section of the ribbon. You will find the chart styles section on the right hand side of the ribbon. For more options, click on the “More” arrow as indicated below:

In our example, select layout 42 at the bottom of the list. Excel will then automatically apply this to your chart, like this:

Andy Trainer
6 May 2009
Excel's Auto Sum feature is a handy time-saving feature that prevents you having to type out lists of commonly used values like sequences of numbers, days of the week or months. Auto Sum is covered in our Excel Beginners Training Course.
Written Instructions
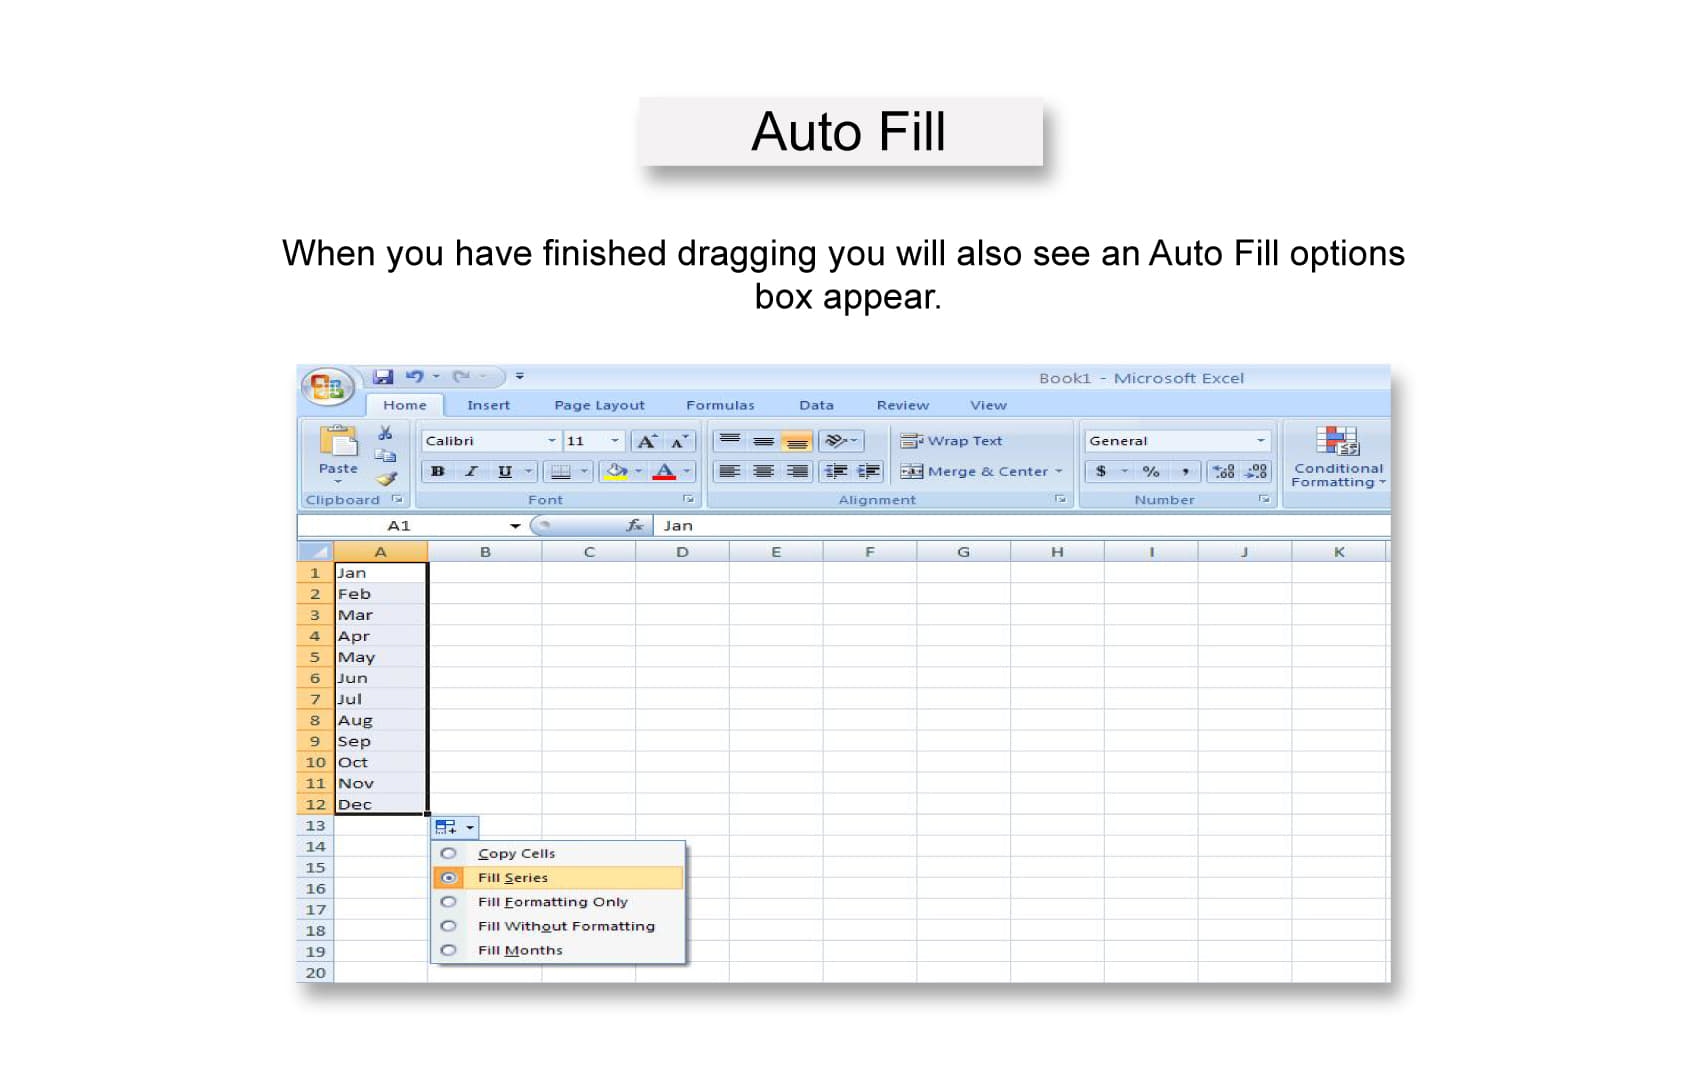
Let's demonstrate this with months. Type "January" in to a cell in your spreadsheet. Highlight the cell and you'll see that there's a little black arrow in the bottom right hand corner. Carefully click on this arrow with the mouse (a bit fiddly!) and hold the button. Now drag the box downwards a few cells and release, and Excel will fill in the subsequent months for you. Clever eh! Even better, it will also recognise abbreviations, such as Jan, Feb, Mar etc...

When you have finished dragging you will also see an Auto Fill options box appear.

If you click on this a drop down menu will appear showing you a list of further options. Whatever you press in this drop down menu will affect the series of numbers that you have created. If you would rather not have Excel type out all of the months and want all of the cells to say January, use the “copy cells” option
Andy Trainer
6 May 2009

For those of you that know Brighton, you can be a testament to the fact that it is filled with a myriad of great places to eat and drink for every kind of consumer. When you’re here for just a short time knowing where to go on your lunch break is of great importance to most!
Don’t stick to the boring sandwich but taste a bit of Brighton without breaking the bank, here are a few of our favorites...... our 7 lunch wonders of Brighton!
Our key to pricing:
£ - under a fiver
££ - between £5 and £10

Pastrami Sandwich from Flour Pot, Image courtesy of Restaurants Brighton
Sarah Longbottom
17 Jun 2016

InDesign Top Tips
Clients always expect absolutely flawless results, and that’s what you should always be aiming for. Spell check should be your new best friend as simple spelling or grammatical mistakes can be the most embarrassing and are normally the most obvious to everyone. I have created a list of a few quick tips that I believe will help tie up loose ends when you’re closing up your project in InDesign.
If you would like to learn more then try our InDesign Training in Brighton, Sussex or perhaps Photoshop Training or Dreamweaver Training would be more beneficial for you.
Find/ Change in InDesign
This is one of the simplest and greatest features of InDesign and you can employ Find/ Change in different ways to help clean up your project. Extra spaces are a real pain and can easily occur without you realising. To use Find/ Change you simply click – Edit – Find/Change (or CTRL + F), then type – a double space in the Find what and then type – a single space in the Change to box, click – find or change all, depending on what you want to do, and then it’ll run and do all the leg work for you by replacing all double spacing with single spacing.
Heather Buckley
29 Oct 2010
 Need Any Help?
Recent Blogs


 Enquire Now


