 Enquiry Now

 Contact Us


 Check Out
 +44 20 4571 2395

 PRINCE2® Foundation and Practitioner Training


|
There are many different ways to draw maps - including photographic techniques and of course old fashioned hand drawing. However if have some Adobe Illustrator skills, using its vector drawing tools is a great option, as it means your maps will be fully scalable - you could blow it up to A0 size without losing any quality. Within Illustrator there are many If you would like to learn more about Illustrator, then come along to our Illustrator Training course in |
Brighton, Sussex. If you already know Illustrator quite well, you may want to have your own private Advanced Illustrator Training. We also run regular Photoshop Training and InDesign Training courses.
An Illustrator map will provide artwork which is razor sharp, scalable, supporting industry standard colours such as Pantone for print and HTML for web.
Illustrator Tutorial: Drawing a Scalable Map in Illustrator CS5
Output Formats
The final format you should export your document in is .EPS for print or GIF for the web. To insert the map into PowerPoint, you might export the map as a JPG at high to maximum quality.
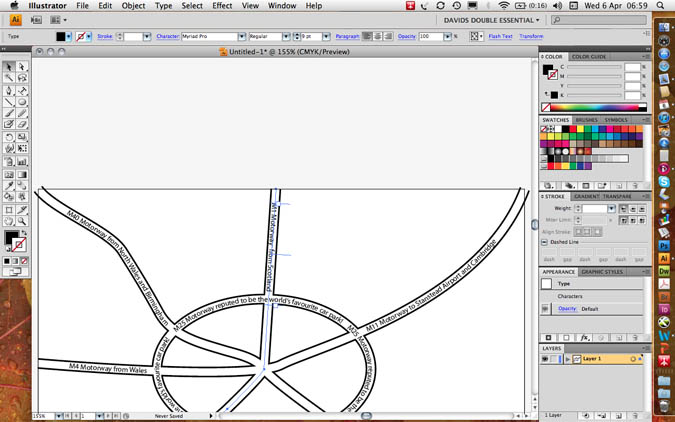
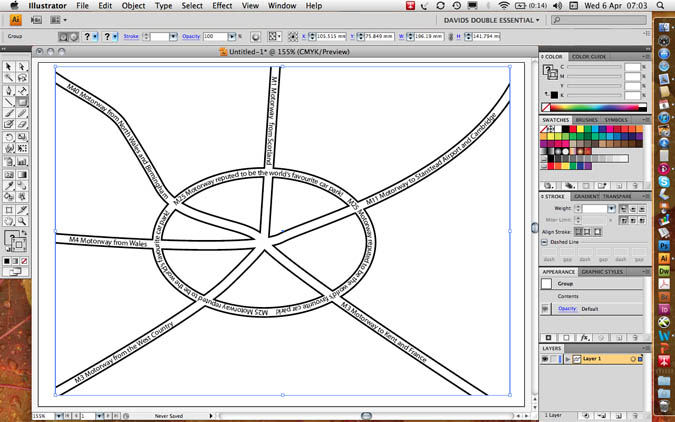
Here is an example of our finished map
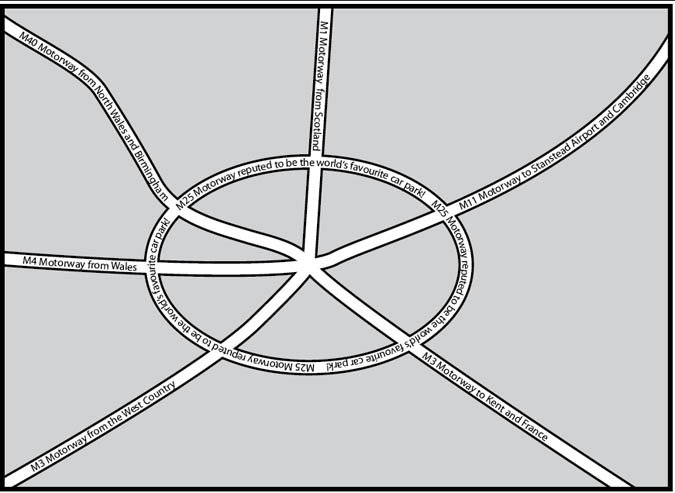
As you can see it does not pretend to have any cartographic or scale accuracy but it is very clear to read and can be simplified to clearly show the way to an office or point of interest, etc.
Tracing over a scan
If one wanted to preserve the accuracy of a previously drawn map, one would need to open a photographic version of another map (a screen grab or a scan), define the layer as a template layer, create a new layer for the new artwork and draw over the scan, keeping the curvature of the roads perfectly accurate. This will be the subject of a further lesson.
N.B. Scanning a map requires permission from the copyright holder.
--READ MORE--
Start a new document
File menu / new or (CTRL+N/ CMD+N)
A5, landscape, no bleed, print or web profile as required by you.
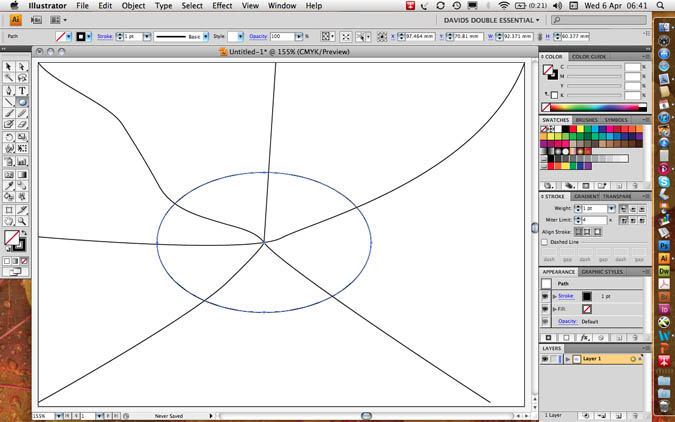
The Roads and Roundabout
Illustrator draws lines in a number of ways: the line tool, the pencil tool and the pen tool.
Use the line tool for separate straight lines
Use the pencil tool for freehand and often wobbly lines
Use the pen tool to give continuous lines of accurate corners (a click), or lines of a precise curvature using industry standard vectors (click drag).
Colours in Illustrator are applied to the Fill (the inside colour of the object) or the stroke (the line going around the edge of the object).
The roads in this map will have a stroke of either black or white, but a fill value of none - the “no entry” colour in the toolbar, the swatches or colour palettes.
It is best to draw the roads with a stroke of one point black.
Draw four or five roads, which intersect at the centre of the map.
Make them extend further than the finished frame of the map.
Notice that when you use the pen tool, a click creates a corner point whereas a drag creates a curvature: drag down for an upward curve and vice versa.
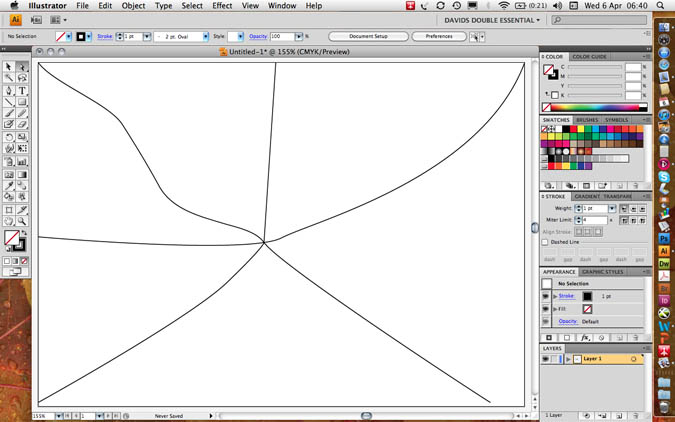
Make a roundabout using the ellipse tool - no 3 in the shape tools. Using the alt key will originate the road from its centre, not from its first clicking point.
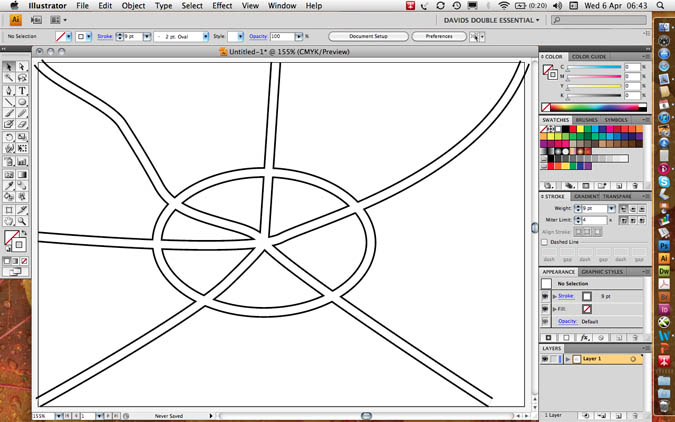
Your artwork should look something like this…
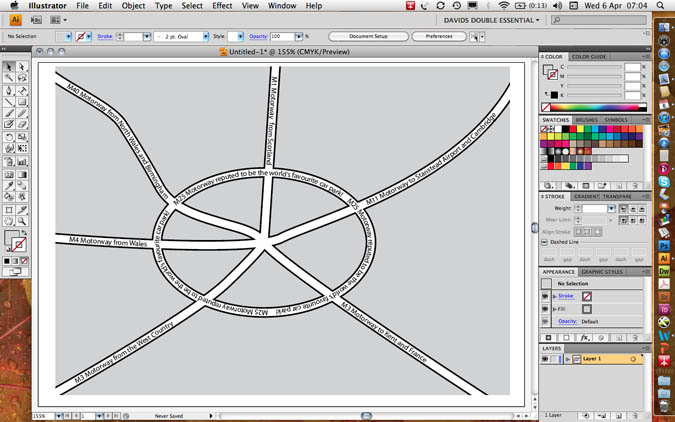
Increase the stroke weight to 13 points and make sure your artwork has a fill value of transparent so that the curves in the roads do not fill in with an opaque solid colour.
Group all the roads (select all CTRL+A / CMD+A then group CTRL+G / CMD+G)

Copy (CTRL+C / CMD+C)
Do not paste (CTRL+V / CMD+V) as this will put a duplicate in the middle of the page; paste in front (CTRL+F / CMD+F) which will make a duplicate exactly in front of the previously copied artwork.
Set the stroke of the new roads down to 9 points and colour them white. This will give you 2 point pavements which neatly interconnect with each other!
Text on a Path
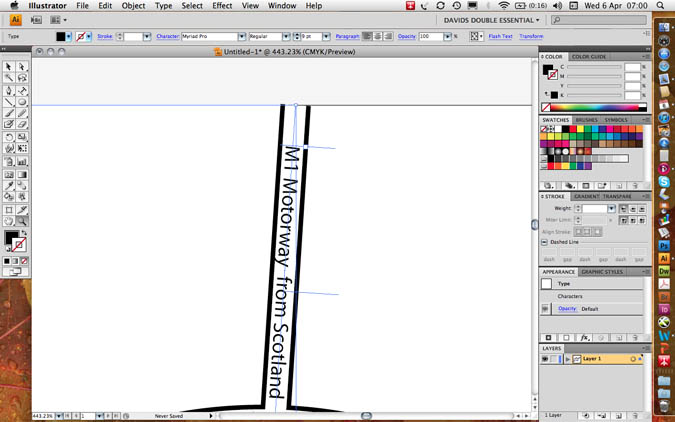
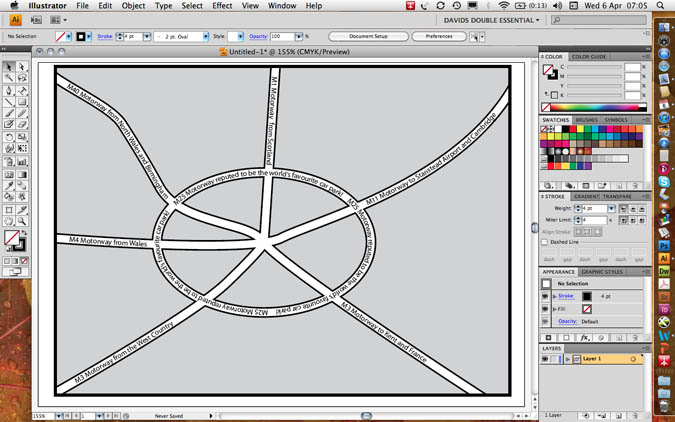
Paste in front (CTRL+F / CMD+F) one more time to provide a grid of black roads. When you click on a line with the third Text Tool (text on a path) the fill and stroke values of the roads will disappear and the type will take on the same direction as the roads, however curved or cornered.
Open the Type Character palette (CTRL+T / CMD+T) from the Type menu or the Window/ Type and tables menu.
Set the type size small enough to sit within the road and use baseline shift (bottom left in the character palette to a negative value so that the text sits in the middle of the road and not on top of it. I used a 9 point line with a minus three point baseline shift in the following example.
The first accurate setting of type characteristics will set a precedent for all of the other roads.
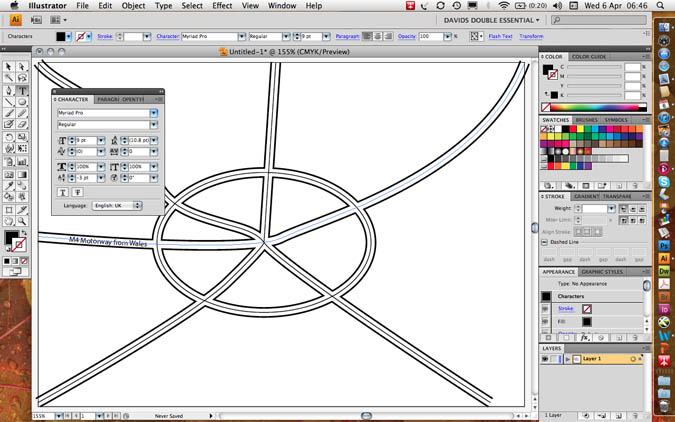
If you want text to go in two different directions on the same path at the same time you will have great difficulty. It is correct to duplicate the line itself; use one line for upward text (e.g. my M4/M11) and a separate line for downward text (my M1)
You will find three text I-beams: the start, the centre and the end point. By dragging the centre point around the end of a line, you can invert its direction.
Masking and the Frame of the Map
Masking
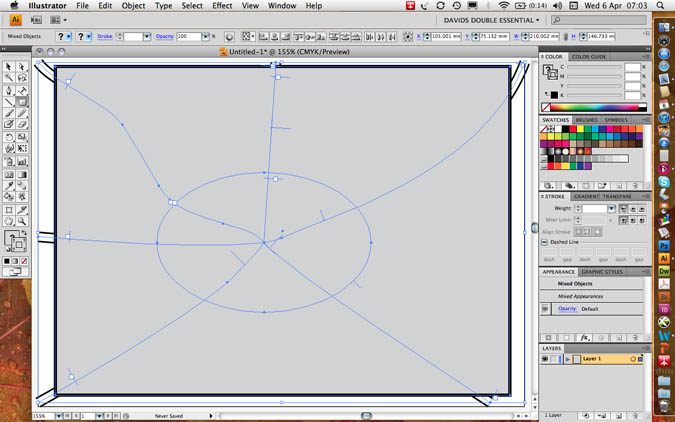
Group all the roads and the text: Select all CTRL+A / CMD+A then group CTRL+G / CMD+G.
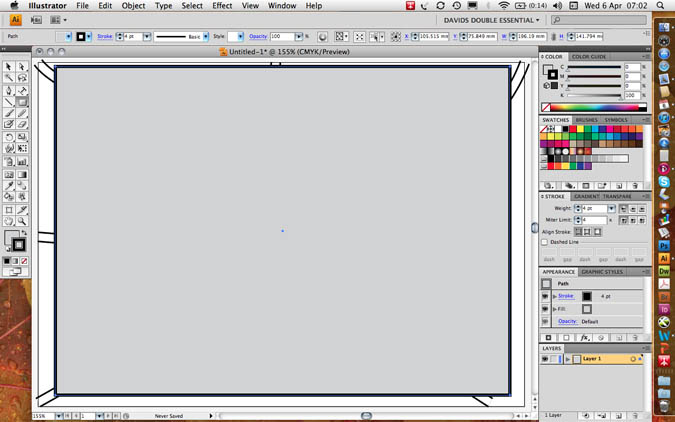
Make a rectangle with the rectangular shape tool which is exactly the same size as the finished map. Please ensure that road ends protrude off each edge.
Give the box a fill value of 20% black and a stroke value of 4 points black.
Copy the box to the clipboard: CTRL+C / CMD+C
Select both the roads and the box.
Go to object menu/ clipping mask/ make to include the map and exclude the overlap. This is what is meant by a “clipping” mask – like scissors.
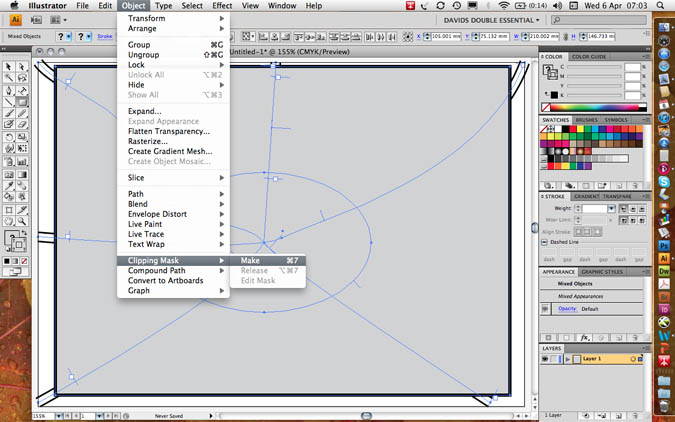
You will notice that the box no longer has any stroke or fill value rather similar to text on a path.
Now paste a copy of the box behind the map with edit menu/ paste behind CTRL+B / CMD+B.
Set the stroke value to 0 points but keep the fill at 20% black.
Next paste a further copy of the box in front CTRL+F / CMD+F and set the fill value to transparent but keep the stroke value at 4 points black to make a neat frame as in the following example.
File Formats for Export
The .EPS Encapsulated Postscript is the most used file format for the printing industry.
It is best practice to keep the version as the latest version with an 8 bit preview for on-screen visibility.
File Formats
Most printing programs accept Illustrator’s .EPS file format, encapsulated Postscript. This format supports background transparency and is infinitely scalable to any size up or down.
I tis never pixelated as the file format is composed of mathematical vectors, lines and curves, and not pixels as found in photographs.
To output files for PowerPoint the bitmap .JPEG format is often preferred. You cannot save as to a photographic file format, but instead should go file menu/ export to JPEG, choosing high to maximum quality.
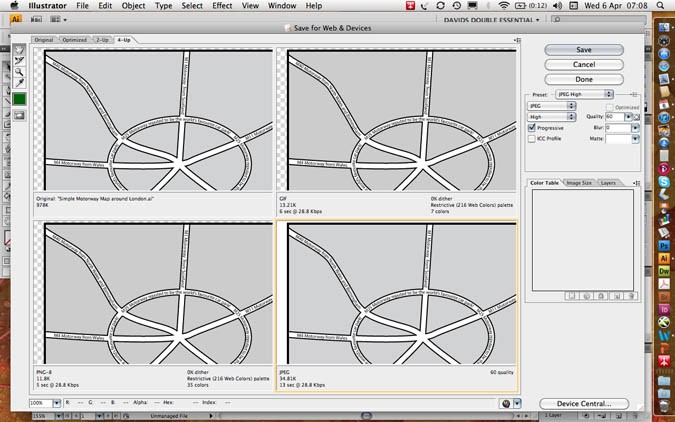
To output files for Web use, go to: file menu/ export for web and devices.
Here you could chose .PNG for web transparency, .GIF for logos or .JPEG.
You can choose optimisation values by choosing a 4-up preview.
 Aaron Charlie
 5 May 2011
 Need Any Help?
Recent Blogs

 Enquire Now


