Enquiry Now

 Contact Us


 Check Out
 +44 20 4571 2395

 PRINCE2® Foundation and Practitioner Training


 Aaron Charlie
 28 Apr 2011

Illustrator Training: Top 10 Time Saving Tips
Here is a list of 10 useful time saving tips to use in Adobe Illustrator. Some of these tips may mean you have to break from your normal use of Illustrator, but getting use to them can be very rewarding in the long run. You may already know a few of these tips, or you may have some more to suggest, if you do then please leave your tip in the comments section below.
New to Illustrator and want to learn more… come along to our Illustrator Training course. If you already know a bit about Illustrator and want a more advanced course we can offer you a private Advanced Illustrator Training

session with your own tailored course outline, call us on 01273 622272 for more details. We also offer Photoshop Training, InDesign Training and other Print Design Training.
10 Time Saving Tips for Illustrator
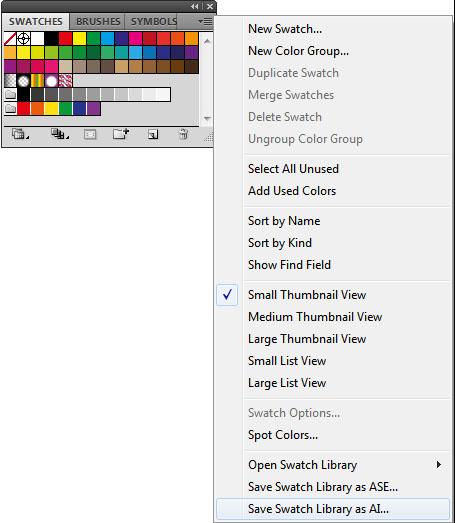
1 - Save and Load your Custom Colour Swatches
Do you find yourself constantly searching for your usual colours or just overwhelmed with the number of available colours when you only need 3 or 4? You need to create yourself a custom swatch. Creating one could save you lots of time in the future and can be easily switched if your colour needs change. Here’s how to do it…
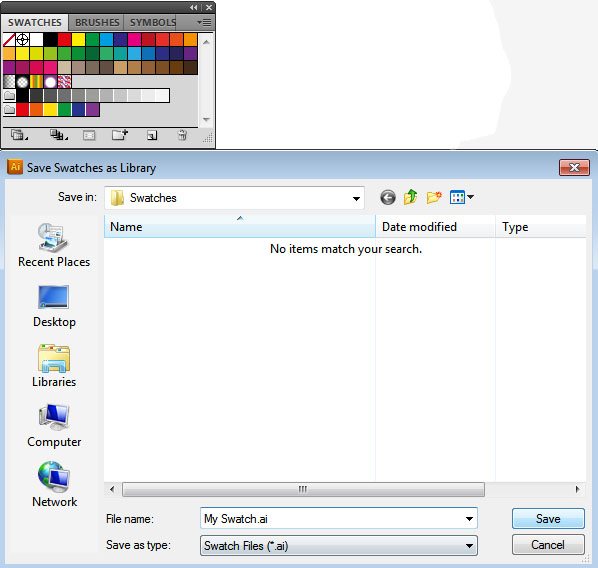
Saving your Swatch - Click on the Dropdown menu in the Swatches Toolbar - Click 'Save swatch library as AI
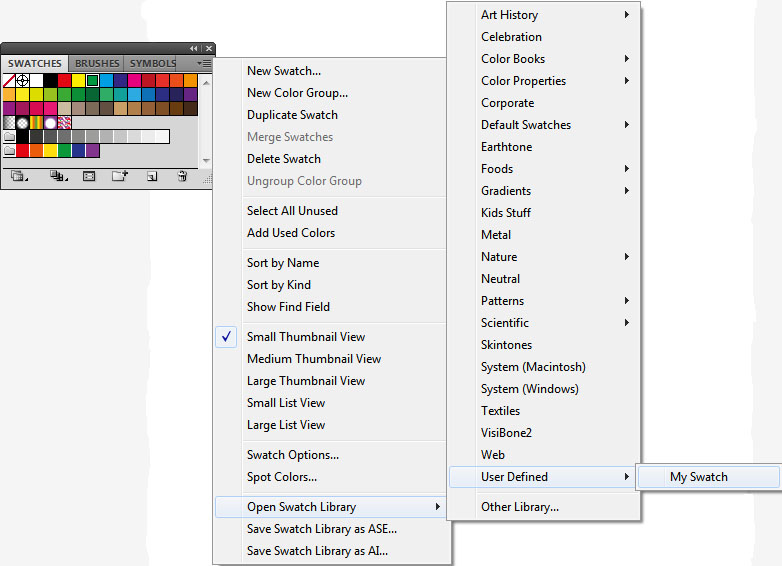
Loading Your Swatch - Click on the Dropdown menu in the Swatches Toolbar - Open Swatch Library - User Defined - Select your saved Swatch.
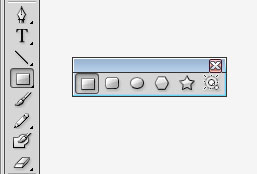
2 - ‘Tearoff’ Tool
If you are using different variations of the same tool you may find this ‘Tearoff’ option very useful. It opens up the toolbar for that tool for easier and quicker access; this is how you get it
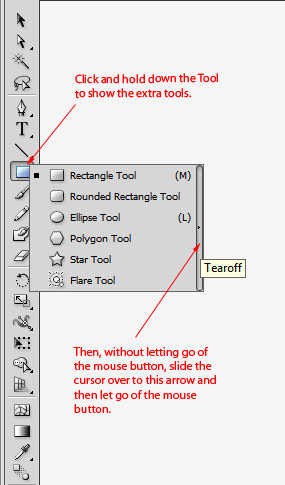
You then have you own toolbar ready to use and easier to reach.
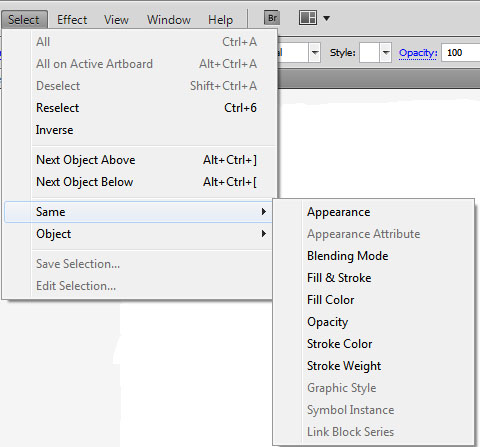
3 - Quick Shape Select
With this option you can quickly select a number of shapes depending on many variables. To do this you have to go to: Select – Same – and then choose your variant.
The different options you have to choose from are; Appearance, Appearance Attribute, Blending Mode, Fill & Stroke, Fill Colour, Opacity, Stroke Colour, Stroke Weight, Graphic Style, Symbol Instance and Line Block Series.
4 - Quickly Duplicate a Shape
Easiest tip in this top 10, simply hold down ALT (or the Option Key on MAC), click and hold an object and drag the cursor to where you want the new replicated object to be placed. Easy!
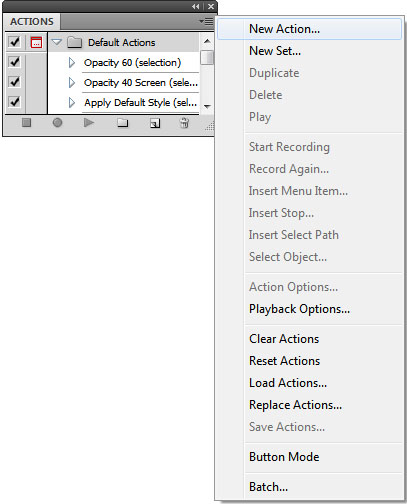
5 - Create Custom Actions in Illustrator
I am sure you are aware you can create custom actions in Photoshop; well you can create custom actions in Illustrator too! At the top of the page should be a box labelled – Essentials (unless you have changed it) click on it and then click on – Automation.

The options down the right-hand side should change and will include ‘Actions’. Click on the drop down box to then create your own actions.
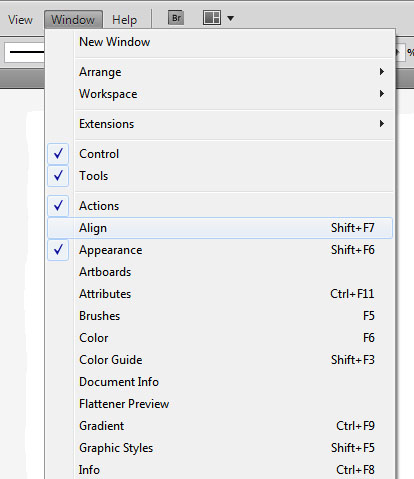
6 - Align Palette – Your New Best Friend!
The Align Palette gives you more creative freedom and makes the guides obsolete. You can find the Align Palette under: Window – Align. Or you can just press SHIFT + F7.
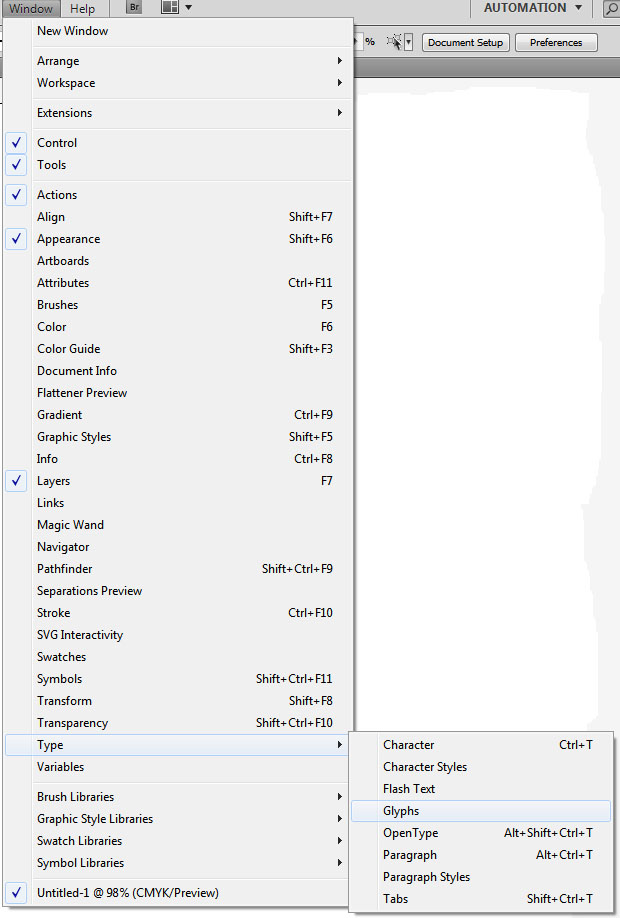
7 - Useful Special Characters – Glyphs Palette
Need to use ©, ™ or ?? Or any other special characters? Well they can be found in Illustrator here: Window – Type – Glyphs
8 - Adjust Effects by using - Appearance Palette
If you usually just hit undo (CTRL + Z) when you've gone wrong with adjusting a shape, you’re wasting time having to re-apply the filters and effects used… an easier way of fixing mistakes is to use the Appearance palette. This can be found here: Window – Appearance (SHIFT + F6)
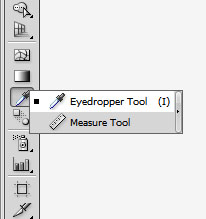
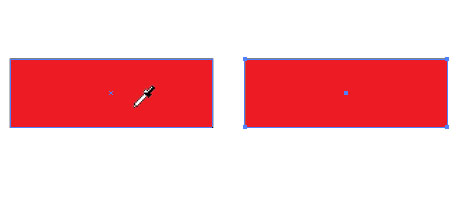
9 - Copy Colours using the Eyedropper Tool
A very quick and easy way of using the same colour for another object - use the Eyedropper Tool. Simply select the Eyedropper Tool from the toolbar, CTRL + Click on the object you want filled in and then click on the colour you want your object to copy.

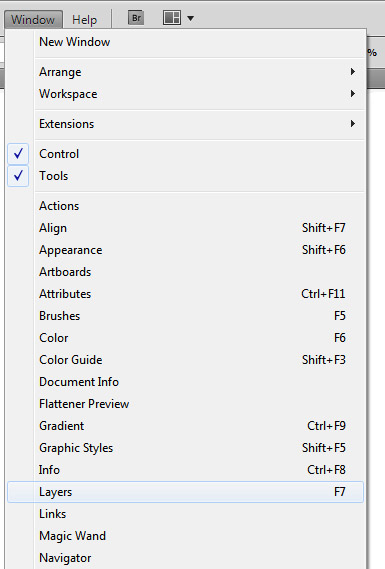
10 - Grouping and Layers Palette
If you have a large group of objects and you want to place a newly created object into the group at a certain depth, you may find yourself with a rather tricky job. Instead of ungrouping all of the objects and trying to control the depth using keyboard shortcuts, drag the path to the point at which you want the object to be placed into the Layer Palette and it will automatically be placed inside that group.
Posted under:
InDesign
top 10
Top 10 Time Saving Tips
time saving tips
illustratoradobe illustrator
Adobe
time saving tips
 Need Any Help?
Recent Blogs