Enquiry Now

 Contact Us


 Check Out
 +44 20 4571 2395

 PRINCE2® Foundation and Practitioner Training


 Aaron Charlie
 28 May 2015
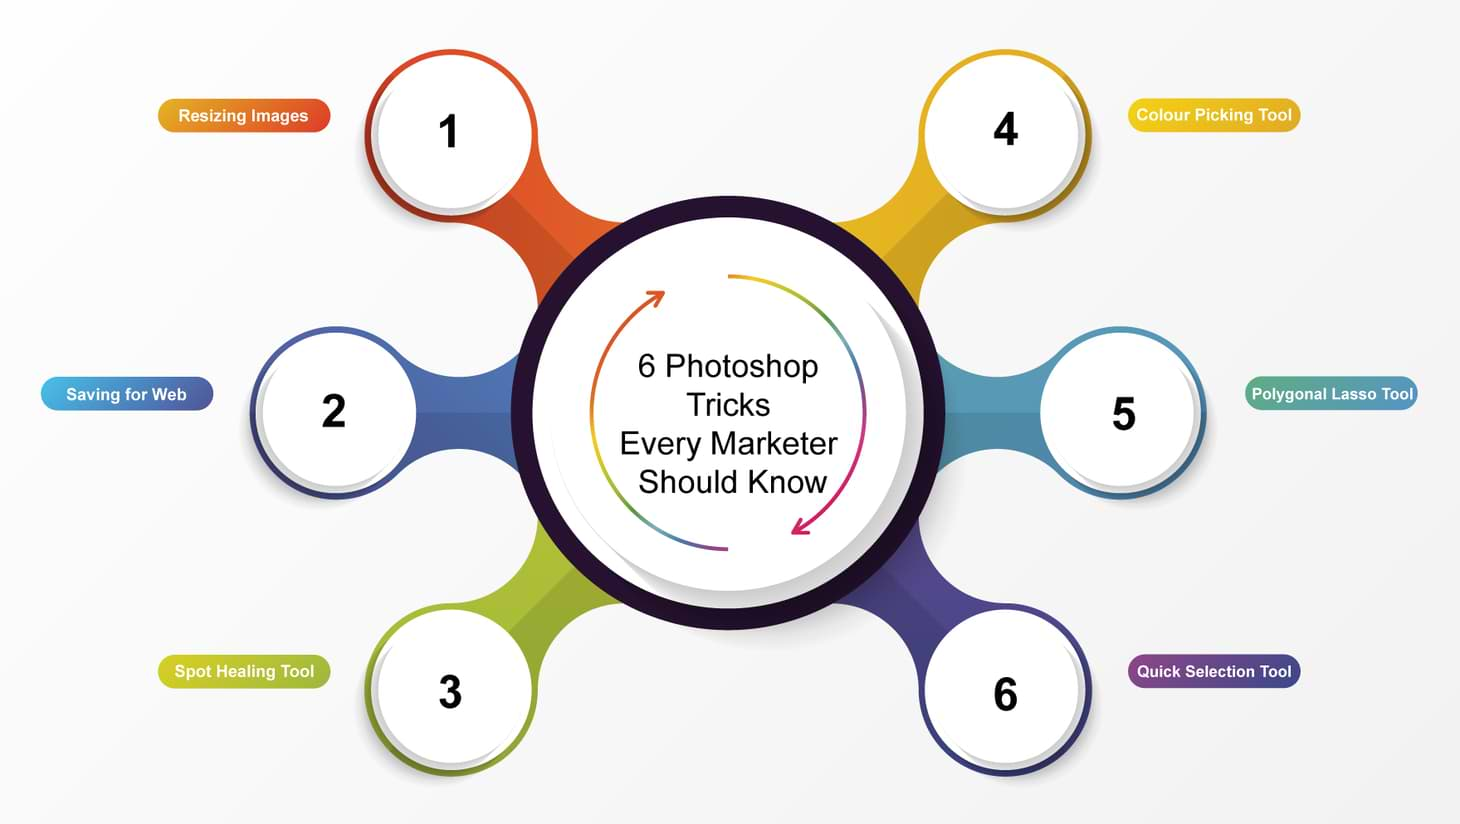
6 Photoshop Tricks Every Marketer Should Know
If you aren’t having sleepless nights over the absurdities of the Polygonal Lasso tool then you’re missing out on modern marketing’s favourite tool.
Photoshop is like skydiving. At first it’s terrifying. Many spend their wholes lives without having done it. Most are too timid to commit to the climb. But minutes in, as you reach the peak of your ascent you feel like you’re flying…
Wait a minute. You are flying? It feels unnatural, you’re in uncharted territory. One glance over the edge and your world as you know it comes crashing down. Chaos, anarchy…elation? The void of uncertainty is overwhelming, there's so much you never knew...
Touchdown. You’ve just had the most incredible marketing revelation of your life; you’re dying to try it again. Soon you’ll be so obsessed with swatches and layers that you’ll find yourself convincing your first born to stop eating play-doh and start designing his graphics in-house. Why can’t everyone else see that smart objects are the best thing since sliced bread?
Have I ever been skydiving? Perhaps not.
Is Photoshop really the best thing since sliced bread? Undeniably.
Is there a company that can provide a quality two-day Photoshop Training course, preferably in the centre of Brighton?
Keep reading and find the six Photoshop techniques every marketer needs to know.
Marketers. If you aren't already hooked on Photoshop then this might change your mind.
- Posts with images account for 89% of all interactions on Facebook alone. Twitter found that users that included photo url’s in posts boosted their retweets by 35%. Images on social media are a must.
- Google’s Mobile Friendly Algorithm update on 21 April 2015, has set out to penalise those with non-mobile friendly websites. This includes your site Images. If your site isn’t responsive, then you’re already limiting your mobile audience enormously.
- Accessibility issues aside, if your images don’t have suitable resolutions for their intended platform then you might as well not have any. There’s nothing more disappointing than spending time and effort writing a great article and it not making a splash online. Resizing images for social sharing is essential.
- The world’s largest search engine also incorporates site load speed into their ranking algorithm. If you have a number of large images on a page, it’s going to hurt your site speed.
So How Can Photoshop Help Me?
Photoshop is even a verb for goodness sake. Verbs, for those of you who don’t know are ‘doing’ words.
Photoshop does everything.
Remember to check out our Adobe Keyboard Shortcuts if you get lost along the way.
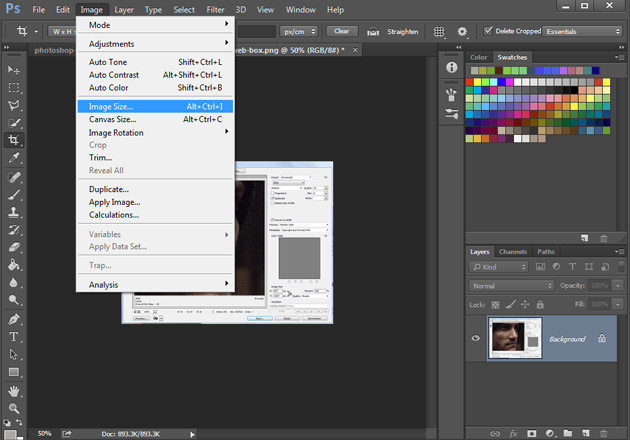
Resizing Images
Knowing how and when to resize image is a necessity for anyone using Social Media. On Photoshop it’s as simple as clicking -> Image -> Image Size and then resizing to the necessary dimensions.
Note – doing so may skew the visibility of text or finer image details
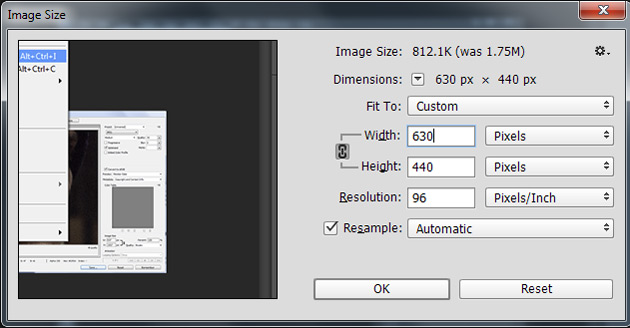
To eliminate this risk try cropping the image with the crop tool. Alternatively you can quickly change the canvas size via -> image -> canvas size and then enter your preferred dimensions as necessary.
Editing your image will alter the original. Save it with a different name to keep the original safe.
Use Sprout Social's 'Social Media Image Sizes' if you aren't sure on which dimensions to use for your chosen platform.
Saving for Web
As we’ve previously mentioned, large images may be pretty, but their performance is ugly. After you’ve got your dimensions sorted, proceed to click file -> Save for Web.
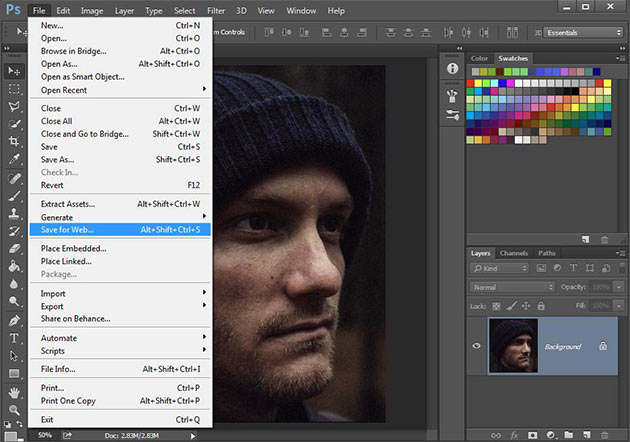
Photoshop is exceptional for the purpose of web friendly images. Use the quality slider to reduce or increase the quality of the image. If you notice in the bottom left of the window, the size of the image (KB in this instance) reflects the changes you make. The window also gives you the option to change the image dimensions if you’ve already forgotten to do so as well as a whole array of extended features.
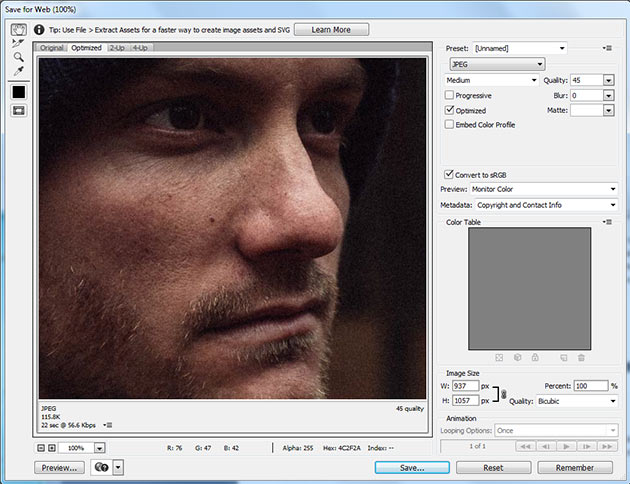
Use save for web to keep your images as small as possible, of course they still need to look aesthetically pleasing to a degree. The incomparable power of the quality slider is in your hands.
Spot Healing Tool
We marketers may be vain but there are other uses for the spot healing tool than perfecting facial blemishes. But I suppose as we’re on the topic, we may as well cover it (no pun intended).
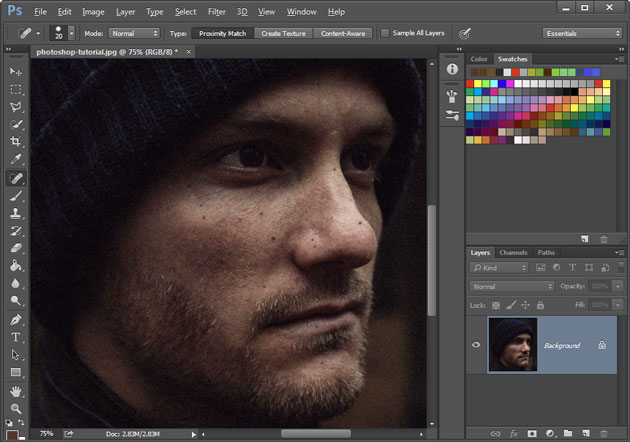
Right click the plaster icon from your tools and select the Spot Healing Tool. Once enabled, use the [ and ] keys to increase and decrease the size of your brush. Toggle Proximity Match at the top of the window and left click on the blemishes you wish to remove, It’s as simple as that.

For larger blemishes use the standard Healing Tool. The spot healing tool automatically selects the ‘source’ to blend over the selected area. The standard healing tool requires the user to select a source with ALT-leftclick. Apart from that, the tool works effectively in the same way but is a little trickier to use.
Alternatively select the clone stamp tool. After selecting the source (alt-click) the user can paint the selected part of the image over another. Great for editing people out of crowds or restoring old photographs.
As they’re a little more advanced than the other techniques we’ve discussed and not necessarily required in day-to-day marketing I’d advise those interested to watch Phlearn’s 'How to Master the Clone Stamp Tool'.
Colour Picking Tool
“That purple hat really goes well with the turquoise we use for our email header, but I’ve been sitting here for 45 minutes now and I can’t seem to find the right purple from this infinitely magical colour wheel”.
Fear no more.
Select the colour dropper from your tool options on the left. Hover over the image on the colour you want to copy and left click.
The colour, in this example – purple, is automatically selected after using the colour dropper. It is then possible to select a brush option and continue to paint with the same colour over the rest of the image.
But what if we want to use that same colour in other applications?
With the colour picker selected, right click to bring up a number of additional options. Copy the colour HTML or hexcode. If you’re using RBG click the dropdown menu from the swatch panel and select RGB sliders. This will open a panel next to your swatches revealing the RGB code of your selected colour.
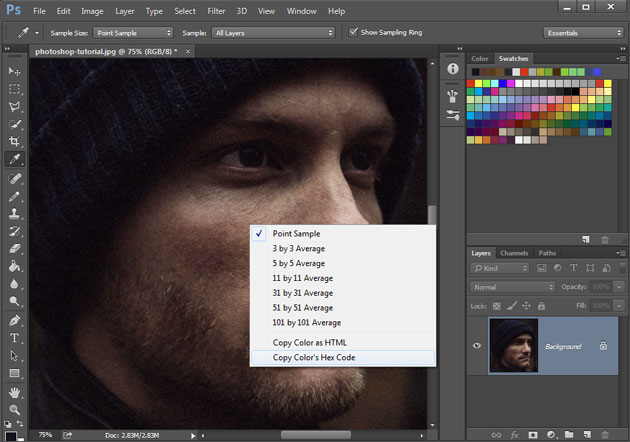
To find out a range of colours from a number of locations on an image simply right click on the colour picker tool and select the colour sampler tool. Left click on up to 10 locations on the image. The RGB code of each colour initially appears in a new panel, as you target more samples, more sections appear. Each section is numbered and corresponds to the crosshairs on the image.
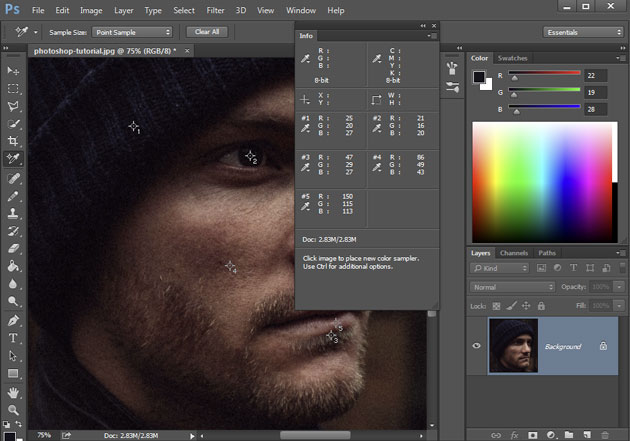
In each section there is the colour picker icon above a small arrow. Clicking the arrow will bring up a drop down menu where we can elect to see CMYK, Hexcode, HTML and RGB values of our samples.

The Polygonal Lasso Tool
Are there a finer set of words in the English language?
Right click the third tool down and select the Polygonal Lasso, or press L. Left click at the edge of the part of the image you wish to select. Continue following the outline of the object, clicking at each corner so that the image is more or less separated from the background. Click at the original location to finalise your selection.
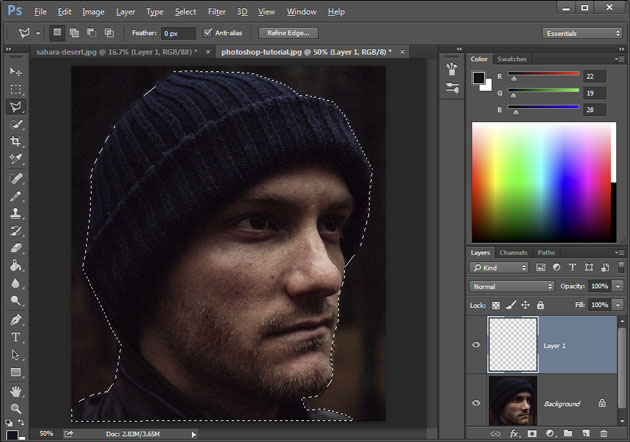
Navigate to Edit -> Copy and then open up a Photoshop tab with your preferred background. Using a Rectangular Marquee (M) tool highlight the area you want to paste to, click Edit -> Paste and watch as your bare selection finds themselves in new surrounding of your choice.
It's great for selecting electronic screen spaces, billboards and houses from an image. But for our particular image, we're far better suited to using the quick selection tool.
The Quick Selection Tool
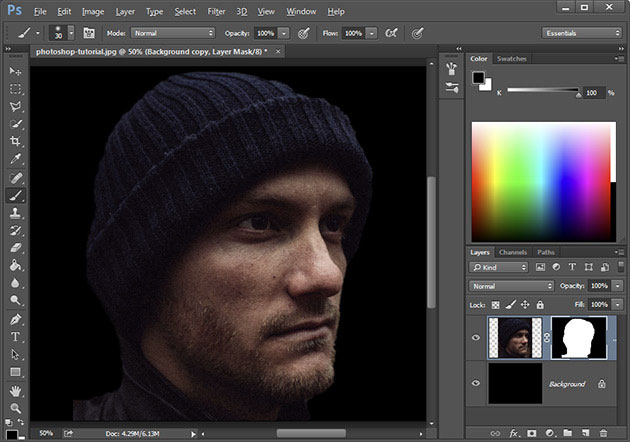
Click the tool icon or press W to bring up the quick selection tool. Use a suitably sized brush and click+hold around the edges of your image. Photoshop cleverly detects the edges of objects making life a whole lot easier for selecting detailed images. At points, the tool may break into the image you want to select. Hold down Alt-click and the tool pushes the selection boundary back. The quick selection tool is incredibly easy to use.
Copy, Cut, Paste or remove your selection as you wish, the quick selection tool is quicker and efficient.
Using a layer mask, we've completely separated our selection from it's original background and added a black background in it's place. Think of the possibilities...
When you first started reading this you were a mere novice. Look how far you've come.
Now you're a lasso wielding Photoshop cowboy, revolutionising the marketing game.
Imagine how much you would learn on our 2-day Photoshop Training course.
 Need Any Help?
Recent Blogs