Enquiry Now

 Contact Us


 Check Out
 +44 20 4571 2395

 PRINCE2® Foundation and Practitioner Training


 Aaron Charlie
 11 Mar 2011
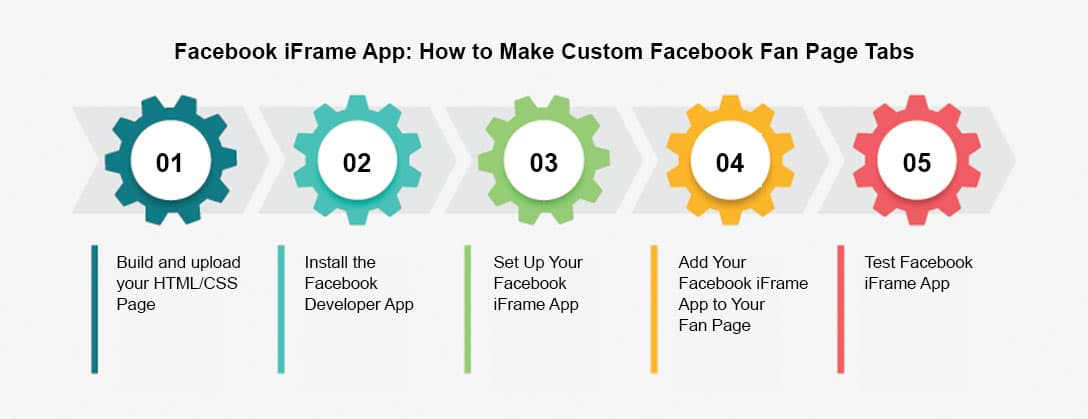
Facebook iFrame App: How to Make Custom Facebook Fan Page Tabs
Custom Facebook Tab Using iFrame App
FBML is Dead - Long Live the Facebook iFrame App!
Lots of businesses use Facebook Fan pages to promote their products and services. In addition to the standard page tabs (Wall, Photos, Links, Videos etc...) Facebook had its own markup language called FBML that allowed you to easily create your own custom tabs. This was really handy for creating custom landing pages and special pages for promotions.
On 10 March 2011 Facebook withdrew FBML (the spoilsports!), so you can no longer add FBML custom tabs to your Facebook Fan page (if you already have an FBML page it will continue to work though - phew!).
HOWEVER - there's a new way to create custom tabs for Facebook pages - enter Facebook iFrame Apps! With an iFrame App, you can create normal web-pages using good old fashioned HTML & CSS, and embed them in new tabs on your Facebook Fan Page - sweet!
To use iFrame Apps you'll need to know some HTML and CSS, and also be able to upload content to an FTP server (which if you have your a website shouldn't be a problem!).
But let's not get ahead of ourselves! In this tutorial we're going to cover how to use FacebookiFrame Apps to create simple HTML page tabs in Facebook Fan Pages
If you have a Facebook Fan Page - find out how to optimize it for SEO here
How to create a custom tab in Fan pages with Facebook iFrame Apps
Before you start - you will need:
- A Facebook Account
- A Facebook Fan Page
- Some web-space that you can upload files to via FTP
OK - if you have all of the above, we're ready to go.
In this tutorial, I'm going to show you how I re-created this with a custom iFrame tab...

STEP 1 - Build and upload your HTML/CSS Page
First up - you need to create the page using normal HTML and CSS and upload it to a piece of webspace via FTP - so really you're just building a normal web-page which you will later embed in your new Facebook iFrame app.
I uploaded our page here - just a standard HTML page and a CSS stylsheet to define the header styles (although you can just as easily use inline styles) - there are a couple of important things to consider...
The maximum page width on Facebook is now 520px - so you will need to set your page width accordingly to avoid ugly scrollbars from appearing. Im my experience it's best to set width to 500px to be safe - To do this - make sure you have the following CSS in your content or your stylesheet:
This will make sure your page isn't too wide - however you'll also need to keep an eye on page length, as if its over 760px this will also cause scrollbars to appear. If that happens you'll need to use a little bit of JavaScript - but more of this later!
STEP 2 - Install the Facebook Developer App
Guess what - you're going to become a Facebook Developer! Exciting!
Log in your Facebook account (the one you admin your Fan page with). The quickest way to find the Developer app is just to search for "Developer" in the Facebook search bar. Click on the app and it will ask for permission to access your basic data - click "Allow"

You'll now be taken to the Developer Page - hit the "Set Up New App" button in the top right

Give the App a name - in my case Photography Competition, and agree to the terms and conditions.
Type the two words in the security check box and hit "Submit"
STEP 3 - Set Up Your Facebook iFrame App
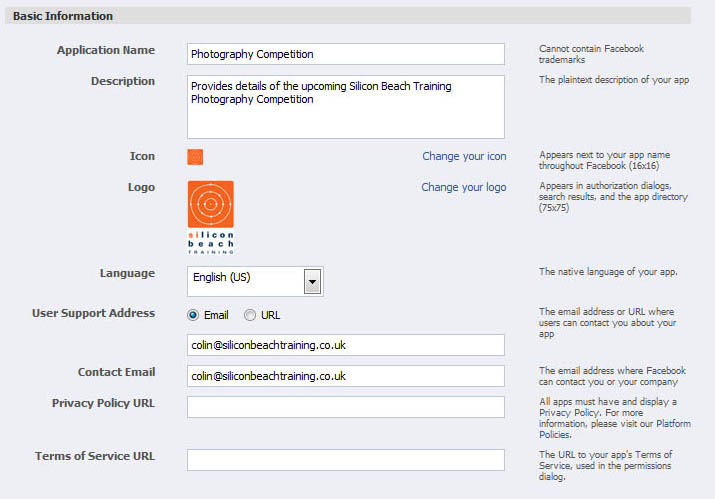
You'll now be taken to the "About" page for your new app where you can fill in the basic details about it.
You can give it a name, and describe what it does, as well as give the app a logo, and an Icon. This small Icon is the one that will appear next to the tab in the sidebar of your Facebook page - so make sure it's appropriate - we've just used the company logo.
Now click on the Facebook Integration tab...
Under Core Settings you can see your unique application ID - make a note of this as you might need it later.
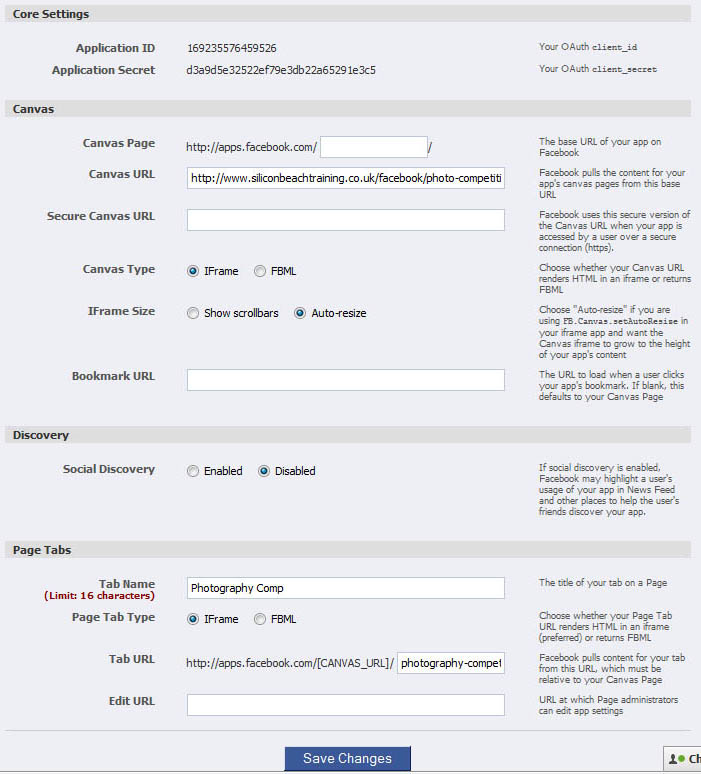
Fill in the Canvas URL - this is the folder on the web that you have uploaded your HTML / CSS files to.
Update: Thanks to skube (see comments below) for pointing out that you will also need to complete the Secure Canvas URL to enable users visiting your site over a secure (https) connection without them having to switch to http to use your page properly. See the Facebook Developer blog for more info on this.
Set the Canvas Type to iFrame, and under iFrame Size set this to Auto Resize (not scrollbars - these will look rubbish if your page is too long - if your page IS too long you can add some JavaScript using the FB.Canvas.setAutoResize command later - see more on this below)
You can set Social Discovery to enabled, or disabled. If you're creating an App that you want other people to add to their pages (as well as adding it you your own) you'll want to enable this to encourage sharing.
Under Tab Name - enter what you want to appear in the tab on the side of your Facebook Page. Irritatingly, this is limited to 16 characters (which wasn't the case with FBML - hrumph!) - so I've had to use "Photography Comp" instead of "Photo Competition"
Under Tab URL - enter the name of the index page in your app folder that you uploaded via FTP earlier. This might be index.html or similar. In my case its photography-competition.html
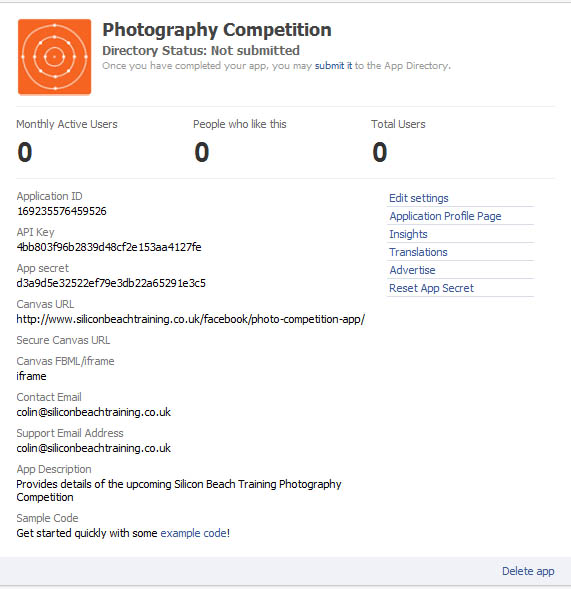
Hit Save Changes and hey-presto - you've created a Facebook iFrame App, and will be taken to a page summarising the details.
Note that I have not submitted the App to the Directory. This is because I just want to use it on my own page - however if you have made an app that you want other people to be able to find and add to their own pages then submit it from here...
To get back to this in future to edit /tweak the settings - go to "Apps" in your sidebar, click on "Developer" and then "See My Apps"
STEP 4 - Add Your Facebook iFrame App to Your Fan Page
From the summary page above, click on Application Profile Page and you'll be taken to a new profile page for your app - this is similar to a standard User Profile - it's got a Wall, you can add basic Info and give it a profile picture - woot!
For now. we just want to add it to our Fan Page to make sure everything looks OK - so click on Add to My Page in the left hand menu.
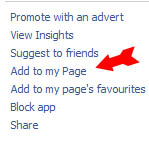
You'll now be given a list of all of the Fan Pages you Admin - for most people just the one.
Click on the Add to Page button next to the page you want the App to appear on...

Now - let's go to the page to check it out!!!
STEP 5 - Test the Facebook iFrame App
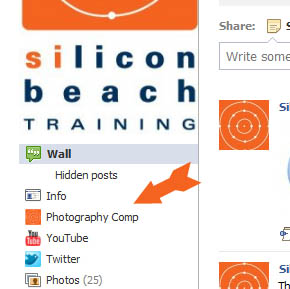
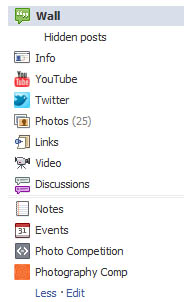
Once you're on the Fan Page you've added your app to, you'll be able to see it in the list of tabs on the left hand side. So on our page I've now got the old FBML page AND the new iFrame page (with its snazzy logo!)
By default it will be added to the bottom of the list, and if you have a lot of apps (like we do) it will be hidden - so click on Moreat the bottom of the list to find it.
Tip - if you want to move it up so everyone can see it, click on Edit - you can then drag your apps around to your heart's content to put them in the right order.
Click on the tab for your App for the moment of truth - how does your new page look embedded in your Facebook Fan page? You'll want to check this before you tell the world its there!
To start with, ours had the dreaded scroll bars - which look ugly as hell!
If you remember earlier, we set the width of our page to 500px - this has prvented any horizontal scrolling - but becuse our page is longer than 760px we've ended up with a vertical scroll bar - ugh!!:

If your page is less than 760px long, you're good to go! If you've ended up with a scroll bar like ours - here's how to fix it.
If you're going to be regularly updating the content in the embedded page (thereby changing its length) you might want to do this anyway as a safety net...
That's it - if you've followed the tutorial all of the way to here - well done - and I hope it's helped you to develop lovely custom tabs for your Facebook Fan Page.
Let us know how you get on...
Silicon Beach Training run regular courses on HTML and CSS. You may not also be aware that we run regular Google Analytics Training, SEO Training and IOSH Health and Safety Training courses.
Posted under:
 Need Any Help?
Recent Blogs