Enquiry Now

 Contact Us


 Check Out
 +44 20 4571 2395

 PRINCE2® Foundation and Practitioner Training


 Aaron Charlie
 9 Mar 2010
How To Upload Wordpress via FTP with FileZilla


If you're going to attend our Wordpress Training course in Brighton, Sussex, we recommend that you download and familiarise yourself with FileZilla prior to attending. FileZilla is a free FTP client that we use on the course.
If you're not attending the Wordpress course but need to know how to use an FTP client to manage the local and remote files in your website, this guide to setting up FTP using FileZillawill be a useful reference guide.
What is FTP?
FTP stands for File Transfer Protocol. It's the standard network protocol for transferring files over the internet. For a more detailed definition check out Wikipedia
For any website you build, you will keep a local copy on your own computer, and a remote copy on the internet - that is, the live version that people see when they visit your site.
An FTP client will allow you to copy your site files from your computer the internet (and vice versa).
If you're making a site with a tool like Dreamweaver you can build and test it on your Mac or PC locally, and then upload to the web via FTP when it's ready. Dreamweaver actually has it's own built in FTP client - you can learn more about this on our 1-day Dreamweaver Training course.
Using Wordpress is different. Once you've downloaded the latest version of Wordpress, uploaded it to your remote webspace and set it all up, you can add your content and make all the amendments directly to the live version of the site using WordPress content management back-end. This lets you preview everything before it's published. However, it's still a good idea to make regular backups of the site via your FTP client in case something goes wrong!
Anyway - here's how to download and set up FileZilla:
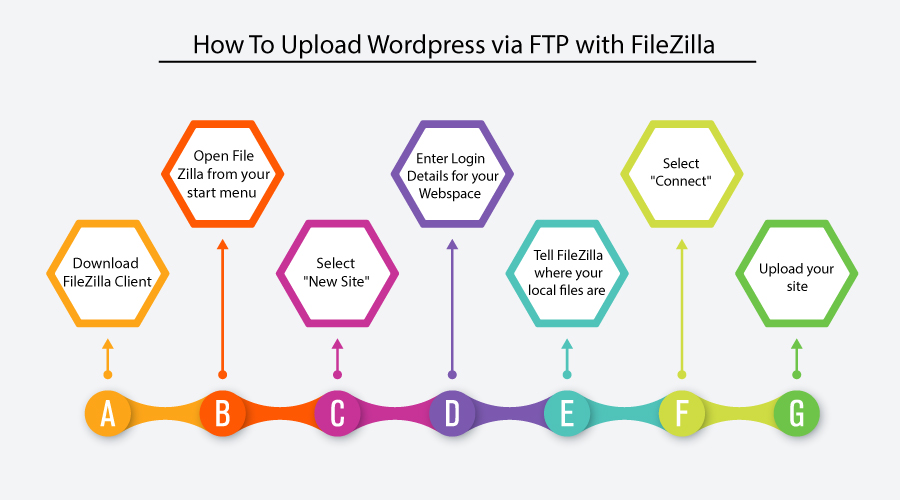
How to upload WordPress via FTP with FileZilla
BEFORE YOU START:
- Make sure your host supports PHP & MySQL - Wordpress uses a MySQL database
- Have your FTP login details to hand
1. Download FileZilla Client at: http://filezilla-project.org/
Double-click The FileZilla icon in your downloads folder to install FileZilla

Click through the installation using the default settings.
2. Open FileZilla from your start menu or desktop
Select File > Site Manager to open the Site Manager dialogue box.

3. Select "New Site" in the Site Manager Dialog Box

4. Enter Login Details for your Webspace
Now you're going to need the login details for the webspace you're hosting your site on. You will be able to get these from your Internet Service Provider (ISP). Most have a control panel where you can log in and find these details.
Fill in your host account name in the Host input field (usually ftp. something)
Select "Normal" from the drop down next to Logontype.
Fill in your Username and Password in the relevant fields

5. Tell FileZilla where your local files are
OK, so Filezilla knows where your website is going to be online - next, it needs to know where you're keeping the local copy of your site. If you're uploading a Wordpress site, you should copy the latest version of Wordpress that you've downloaded and unzipped in to here.
Click on the "Advanced" tab in the Site Manager Dialog box.
Click on the "Browse" button next to the "Default local directory:" field, and select your local folder

6. Select "Connect". FileZilla will now connect to your webspace via FTP (you'll see it talking to your server in the top window pane) and once connected you should see something this (click for larger image):

If FileZilla won't connect - check your settings again in the Site Manager - if you're unsure, double check with your ISP.
On the left-hand pane you will see your local files and folders.
On the right-hand pane you will see your remote files and folders.
7. Upload your site
At the moment there's nothing there on the remote site, so the next step is to upload copies of your local files to your remote webspace.
To upload a file: Select a file from the left-hand side and drag it over the white area on the right-hand side. Release the file.
NOTE: if you've already uploaded the file previously you will be asked whether you'd like to save over the remote copy. Only ever copy over files if you know the file you're uploading is the latest version.
In this instance, we want to upload the whole Wordpress site from our local copy, so...
Select all of the files in your local folder by clicking on any file and then pressing ctrl + a
Now drag all of the files in to the right pane and wait for them all to upload (this could take a little while). Now you should see something like this with the same files on both sides (click image for larger version).

If you want to download a file from the remote site to your local copy (e.g. if you're backing up). Drag a file from the right-hand side and release it on the left-hand side, again making sure that you're not over-writing anything important.
You've now uploaded your Wordpress site! If you go to your web-site address you will now seethe Wordpress installation screen, which looks like this:

We cover how to install Wordpress from here on our Wordpress Course. We'll also be posting a how-to with more details here soon - so watch this space!
Posted under:
 Need Any Help?
Recent Blogs